Edit of asset "Godot AI" Accepted
| Old/Current | New/Edit | |
|---|---|---|
| Title | Godot AI | Godot AI |
| Description |
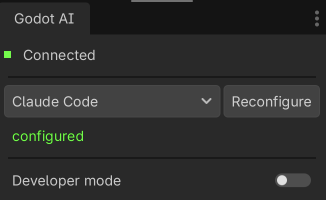
Godot AI connects MCP-compatible AI assistants (Claude Code, Codex, Antigravity, Cursor, etc.) to a live Godot editor. Build scenes, write and attach scripts, design UI, animate, create materials and particle effects, run tests, and read editor data — all from chat. From the creators of MCP for Unity — the most widely used gamedev MCP, with 9,200+ GitHub stars and hundreds of thousands of users — built from the ground up for Godot. Robustness and deep QA are core to our approach, shaped by over a year of development and community feedback on MCP for Unity. Good Setup / Demo Video: https://youtu.be/9qCt7gxPJkY?si=nP1-gZ0l3hkC-FTy&t=51 Discord: https://discord.com/invite/FDZ5fr2QkP Demo project shown below: dynamic, interactive UI panels drawn 100% procedurally with Godot AI — no textures, sprites or shaders. About 2 hours of work: https://github.com/hi-godot/cyberpunk-hud-demo Full docs and repo: https://github.com/hi-godot/godot-ai Features: - 150+ operations spanning scenes, nodes, scripts, animations, UI, themes, materials, particles, audio, cameras, input mapping, and project settings - One-click setup for 19 MCP clients — Claude Code, Claude Desktop, Codex, Antigravity, Cursor, Windsurf, VS Code, VS Code Insiders, Zed, Gemini CLI, Cline, Kilo Code, Roo Code, Kiro, Trae, Cherry Studio, OpenCode, Qwen Code, Kimi Code - Build entire UI hierarchies from a single prompt - Materials (StandardMaterial3D, ORMMaterial3D, ShaderMaterial) and particles (GPU + CPU, 2D + 3D) with one-call presets — fire, smoke, sparks, magic, rain, explosion, lightning - AnimationPlayer authoring with fade/slide/shake/pulse presets - Inline or .tres resource authoring (meshes, shapes, curves, gradients, styleboxes) - Smart screenshots (editor viewport, in-game framebuffer, or cinematic camera) so AI agents can see your scene - Multi-instance support across multiple Godot editors Requirements: Godot 4.3+ (4.4+ recommended) and an MCP client. Quick Start: Install uv (one-time): macOS/Linux: curl -LsSf https://astral.sh/uv/install.sh | sh Windows (PowerShell): irm https://astral.sh/uv/install.ps1 | iex Install the addon from the Asset Library (or drop plugin/addons/godot_ai into your project's addons/ folder). In Godot: Project > Project Settings > Plugins — enable "Godot AI". Open the Godot AI dock and click your MCP client to configure it in one click. Open your MCP client and start prompting. Coming next: Physics, Shaders, Terrain, Custom Tools Privacy: Godot AI uses limited, anonymous telemetry to improve reliability. It does not collect file paths, project names, scene or source contents, or other user-identifying data. Telemetry can be fully disabled with GODOT_AI_DISABLE_TELEMETRY=true or DISABLE_TELEMETRY=true (no traffic, no UUID generated). More here: https://github.com/hi-godot/godot-ai/blob/main/docs/TELEMETRY.md |
Godot AI connects MCP-compatible AI assistants (Claude Code, Codex, Antigravity, etc.) directly to a live Godot editor via the Model Context Protocol. Inspect, build, paint, and animate your scenes from a prompt — create nodes, wire signals, compose UI, author materials and particle effects, run tests, and read editor data without leaving chat. The third preview image was built from two prompts in five minutes — no manual editor work. From the creators of MCP for Unity — the most widely used gamedev MCP, with 8,500+ GitHub stars and hundreds of thousands of users — built from the ground up for Godot. Robustness and deep QA are core to our approach, shaped by over a year of development and community feedback on MCP for Unity. Features: - 80+ MCP tools spanning scenes, nodes, scripts, animations, UI, themes, materials, particles, input mapping, and project settings - Materials: StandardMaterial3D, ORMMaterial3D, and ShaderMaterial — plus six presets (metal, glass, emissive, unlit, matte, ceramic) - Particles: GPU + CPU, 2D + 3D, with seven presets (fire, smoke, spark_burst, magic, rain, explosion, lightning) — one call spawns emitter, process material, mesh, and billboard as a single undoable action - Smart screenshots so AI agents can see the scene - Build entire UI hierarchies from a single prompt - One-click client setup for Claude Code, Codex, and Antigravity - Multi-instance support across multiple Godot editors - Auto-managed Python server — enable the plugin and go Requirements: Godot 4.3+ (4.4+ recommended) and an MCP client. Quick Start: 1. Install uv (one-time): macOS/Linux: curl -LsSf https://astral.sh/uv/install.sh | sh Windows (PowerShell): irm https://astral.sh/uv/install.ps1 | iex 2. Install the addon from the Asset Library (or drop plugin/addons/godot_ai into your project's addons/ folder). 3. In Godot: Project > Project Settings > Plugins — enable "Godot AI". 4. Open the Godot AI dock and click your MCP client to configure it in one click. 5. Open your MCP client and start prompting. Full docs: https://github.com/hi-godot/godot-ai Coming next: Physics, Shaders, Terrain, Custom Tools, More Client Configurations |
| Category | Tools | Tools |
| License | MIT | MIT |
| Repository Provider | Custom | Custom |
| Repository Url | https://github.com/hi-godot/godot-ai | https://github.com/hi-godot/godot-ai |
| Issues Url | https://github.com/hi-godot/godot-ai/issues | |
| Godot version | Godot 4.5 | Godot 4.3 |
| Version String | 2.9.0 | 0.4.3 |
| Download Commit | https://github.com/hi-godot/godot-ai/releases/download/v2.9.0/godot-ai-plugin.zip | https://github.com/hi-godot/godot-ai/releases/download/v0.4.3/godot-ai-plugin.zip |
| Download Url (Computed) | https://github.com/hi-godot/godot-ai/releases/download/v2.9.0/godot-ai-plugin.zip | https://github.com/hi-godot/godot-ai/releases/download/v0.4.3/godot-ai-plugin.zip |
| Icon Url |
https://raw.githubusercontent.com/hi-godot/godot-ai/main/docs/icon.png
|
https://raw.githubusercontent.com/hi-godot/godot-ai/main/docs/icon.png
|
| Preview Insert | ||
|---|---|---|
| Type | image | |
| Image/Video URL |
https://raw.githubusercontent.com/hi-godot/godot-ai/main/docs/hero.png
|
|
| Thumbnail |
https://raw.githubusercontent.com/hi-godot/godot-ai/main/docs/hero.png
|
|
| Preview Insert | ||
|---|---|---|
| Type | image | |
| Image/Video URL |
https://raw.githubusercontent.com/hi-godot/godot-ai/main/docs/images/dock.png
|
|
| Thumbnail |
https://raw.githubusercontent.com/hi-godot/godot-ai/main/docs/images/dock.png
|
|
| Preview Insert | ||
|---|---|---|
| Type | image | |
| Image/Video URL |
https://raw.githubusercontent.com/hi-godot/godot-ai/main/docs/images/space-city.png

|
|
| Thumbnail |
https://raw.githubusercontent.com/hi-godot/godot-ai/main/docs/images/space-city.png
|
|