This is the second blog post describing enhancements for visual shaders and shader scripts landed in Godot 3.2. You can read the first part here. Since the previous update, I’ve (Chaosus) spent much time and effort adding a lot of new things to enhance the overall experience developing shaders.
Shader changes
First, let’s have a look at shader scripts.
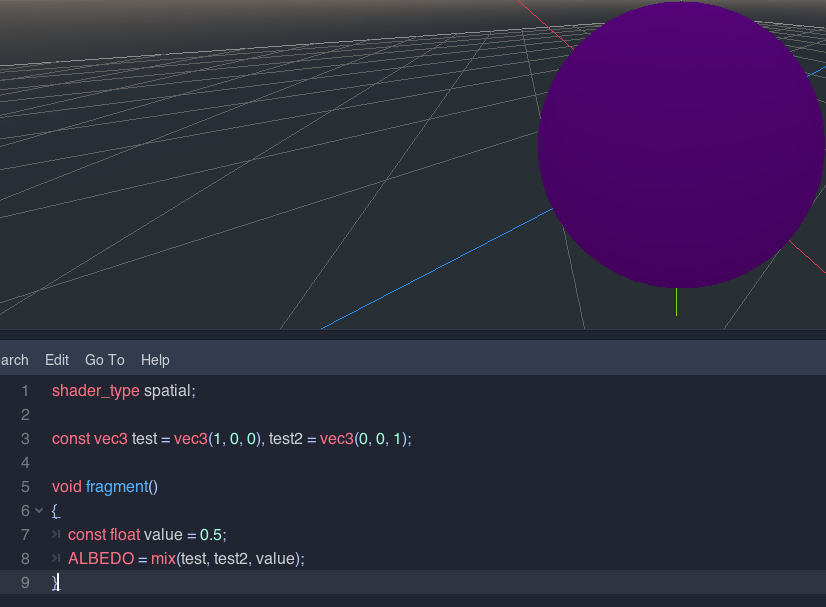
Constants support
Constants can be used in global and local spaces. They may be better than uniforms in terms of performance, at the cost of not being accessible outside the shader. You can define multiple of them in a single line.
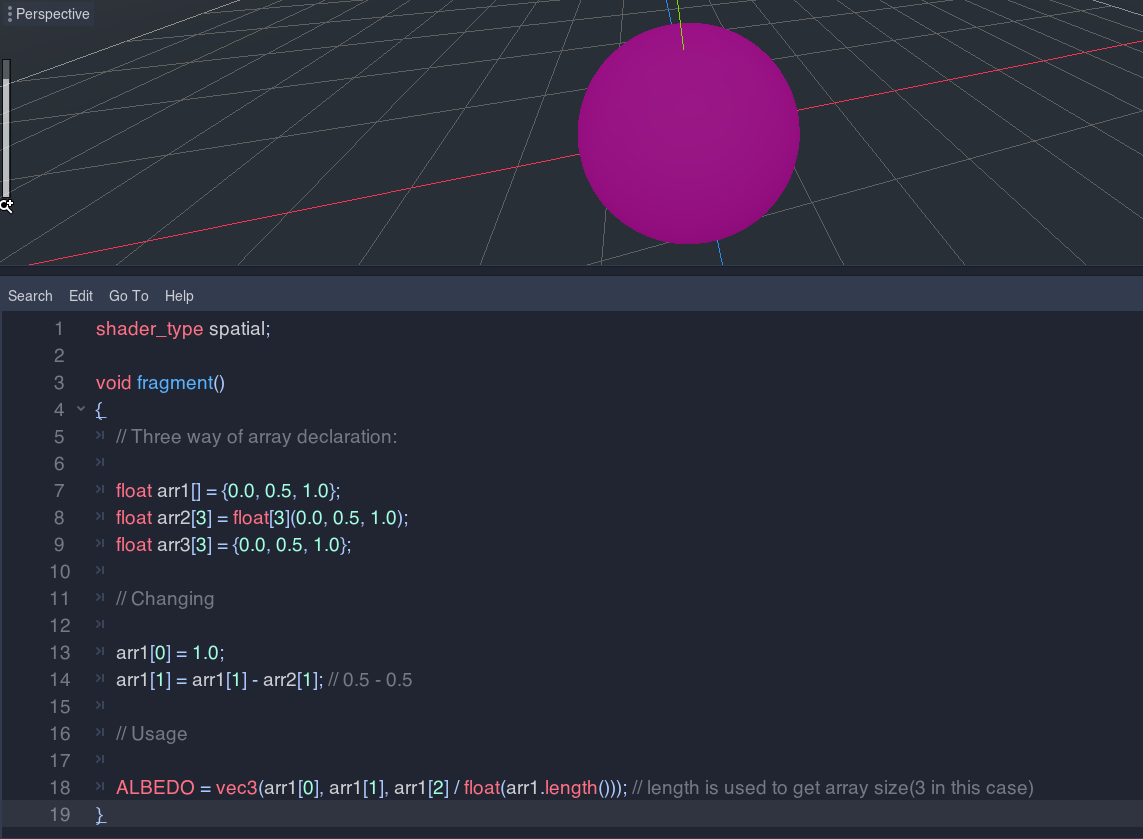
Local arrays support
It is now possible to define and use arrays inside functions.
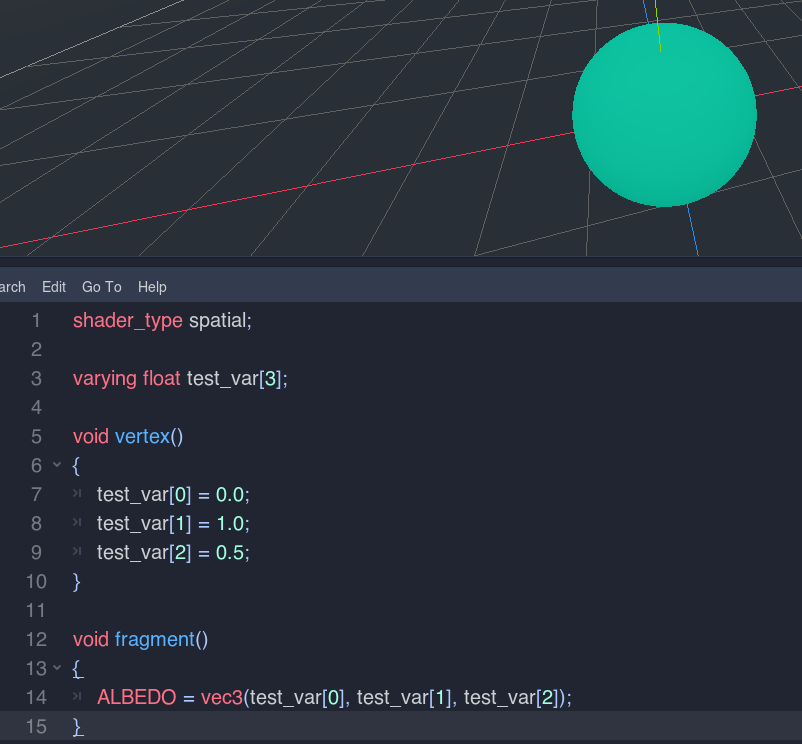
Varyings arrays
Varyings types may also be used as arrays to pass multiple variables from the vertex function in a single variable.
Do/while loops
do was added as a keyword in Godot shaders which allows the standard C do/while combo inside your shaders like:
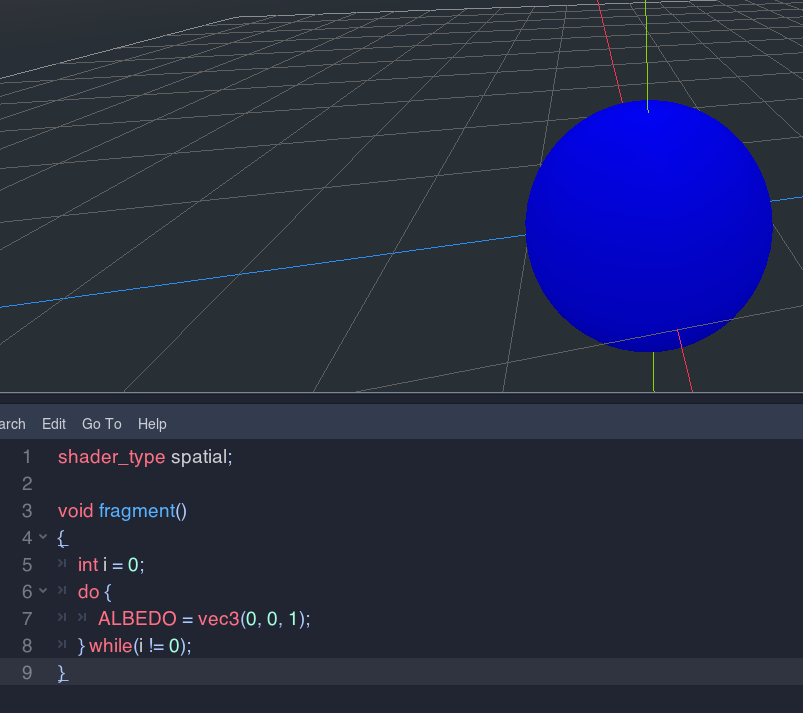
The expression after do will execute at last once, unlike standard while where it’s not guaranteed.
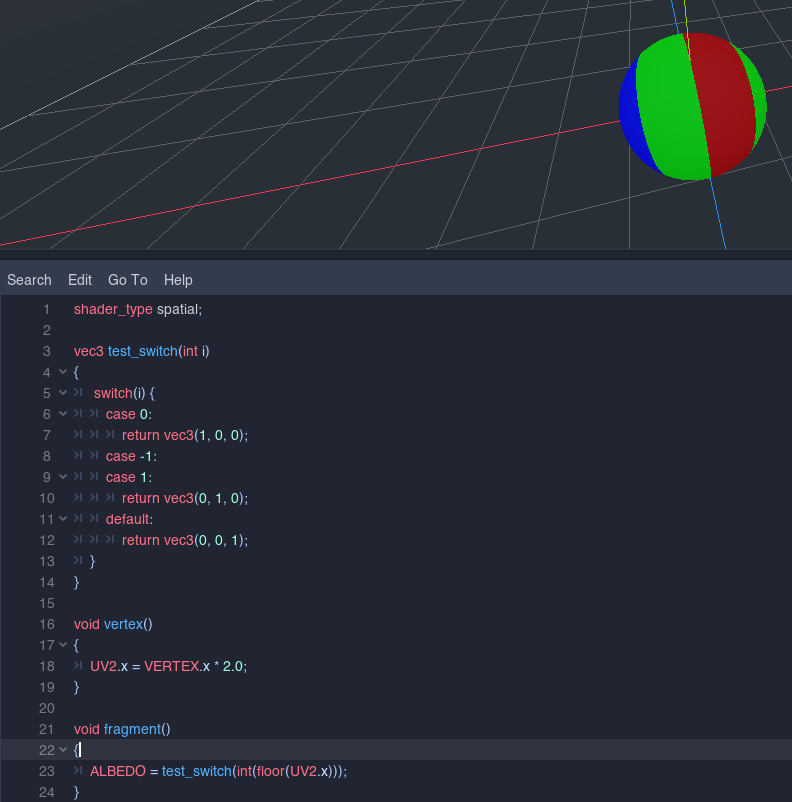
Switch statements
switch was added for high-end backends (GLES3/Vulkan) as an operator similar to the standard C switch (due to OpenGL ES 2.0 limitations, it’s not available in the GLES2 backend). Multiple cases may fall through each other. The new default keyword may be used to define the common case behavior.
GLES3 functions in GLES2
Many functions have been implemented in the GLES2 backend to match GLES3. Those were not available in OpenGL ES 2.0’s version of GLSL, so we implemented our own shader standard library to provide them in both backends.
- sinh
- cosh
- tanh
- asinh
- acosh
- atanh
- determinant
- round
- roundEven
- inverse
- isnan
- isinf
- outerProduct
- transpose
- trunc
Their performance may be lower, compared to GLES3 countreparts, but its better than not having them at all.
Besides that, the unavailable GLES3 functions in GLES2 are now restricted from usage to prevent shader crashing.
Visual Shader changes
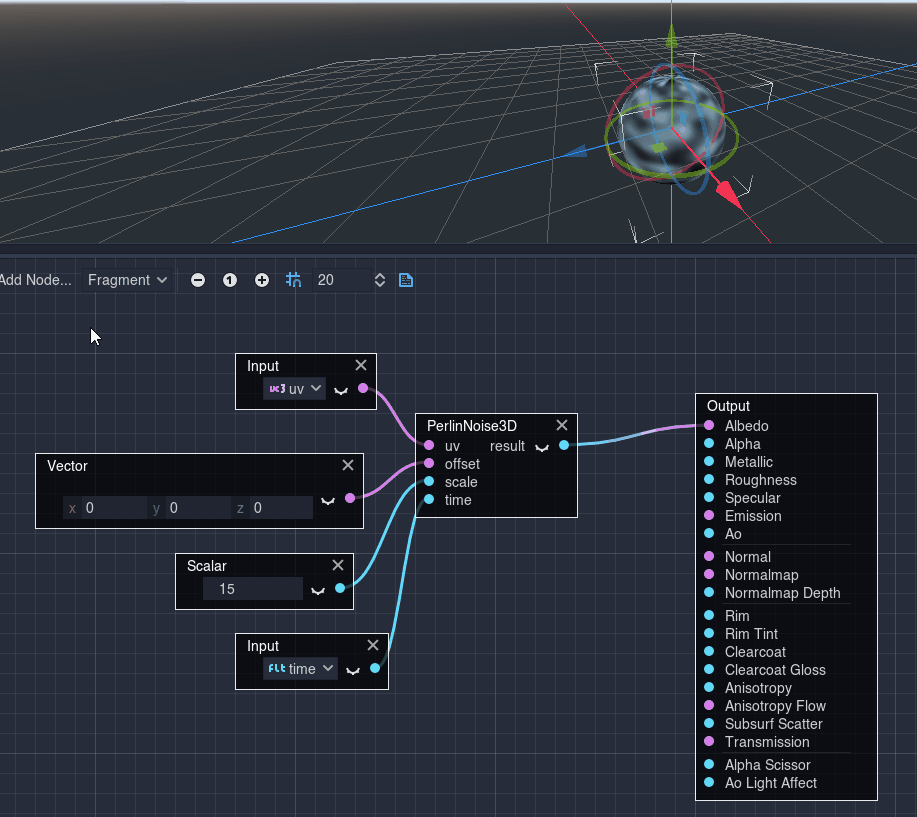
Custom nodes
This feature allows you to create your libraries of shader functions and use them within the editor or distribute them to other users. Its primary goal is to give users the possibility to implement code parts inside code modules as easily as possible. The following graph describes the process to create them:
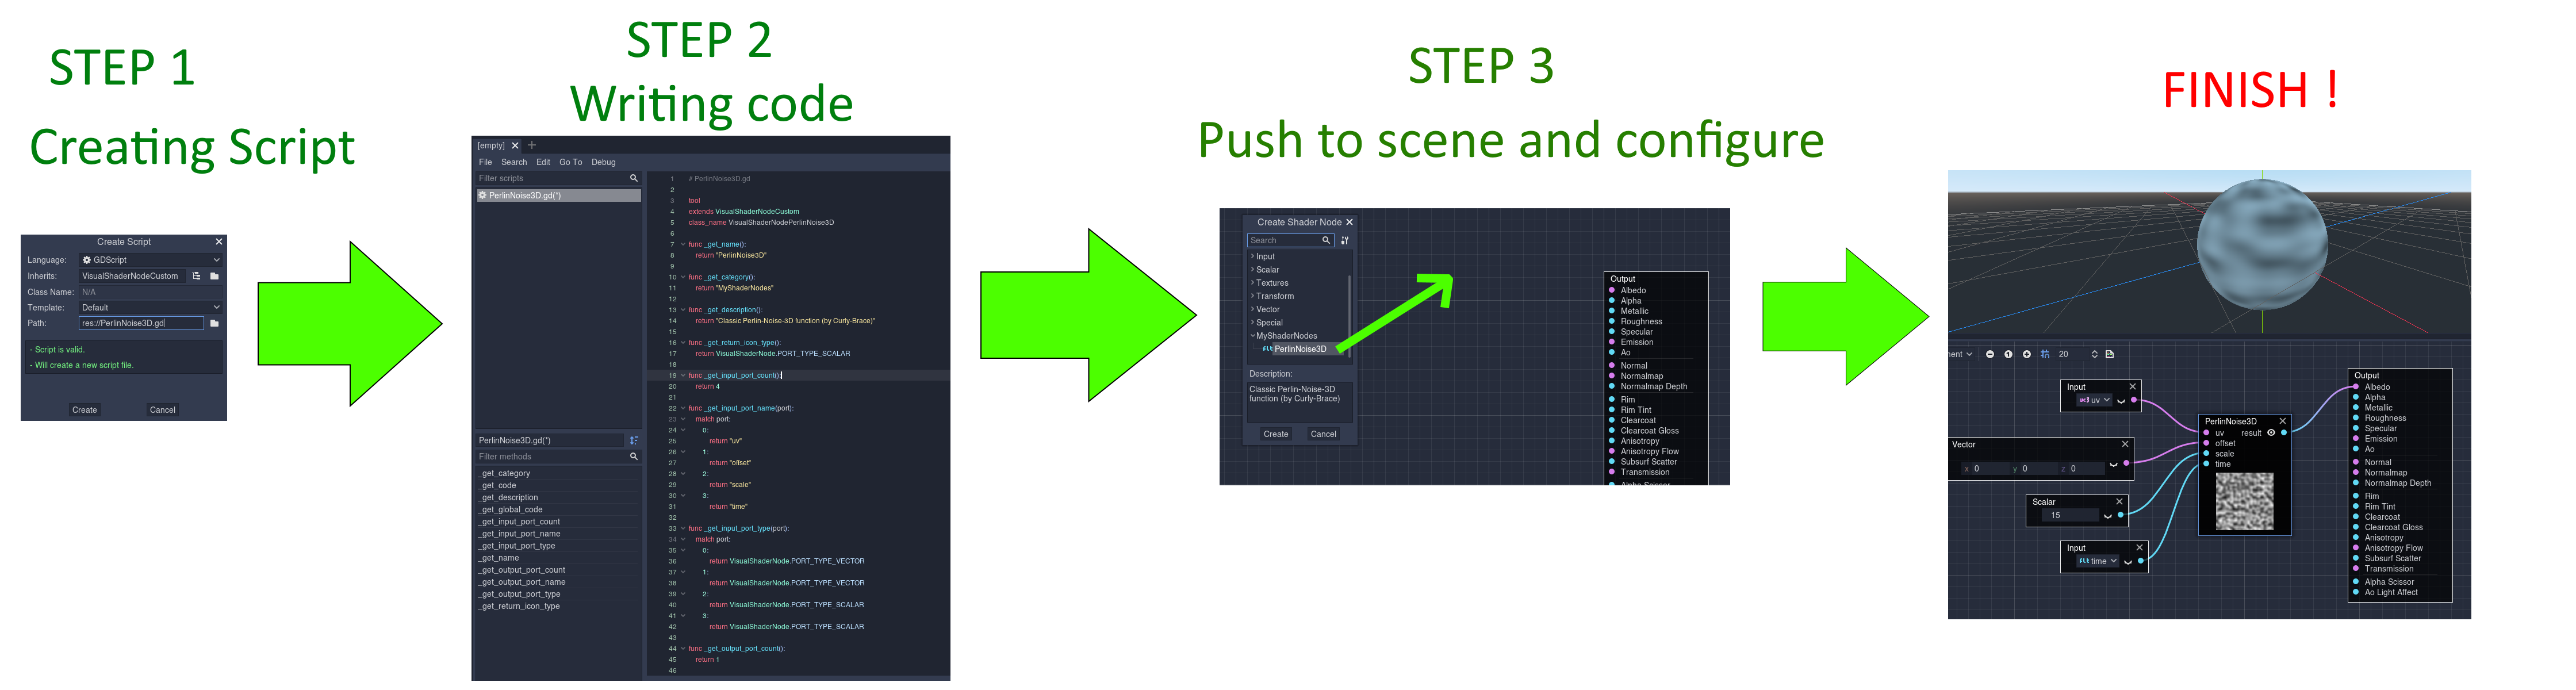
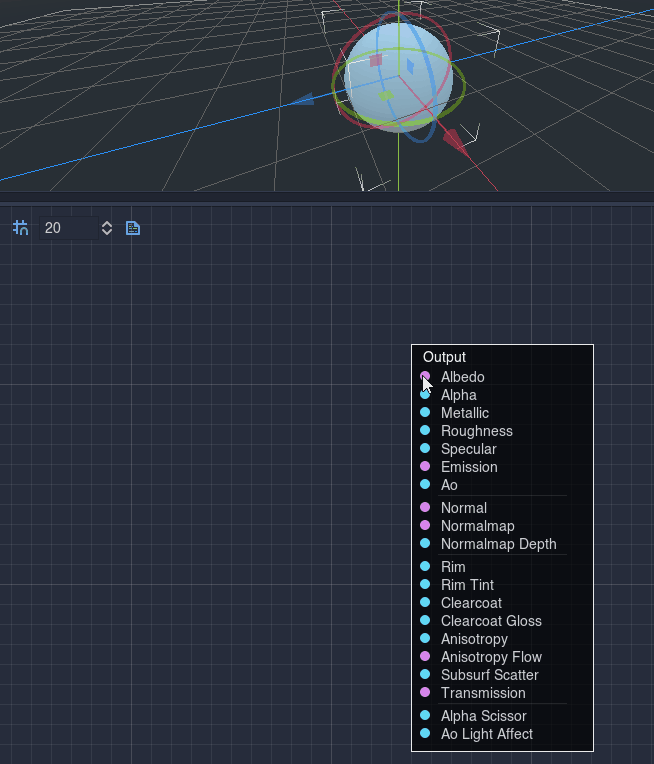
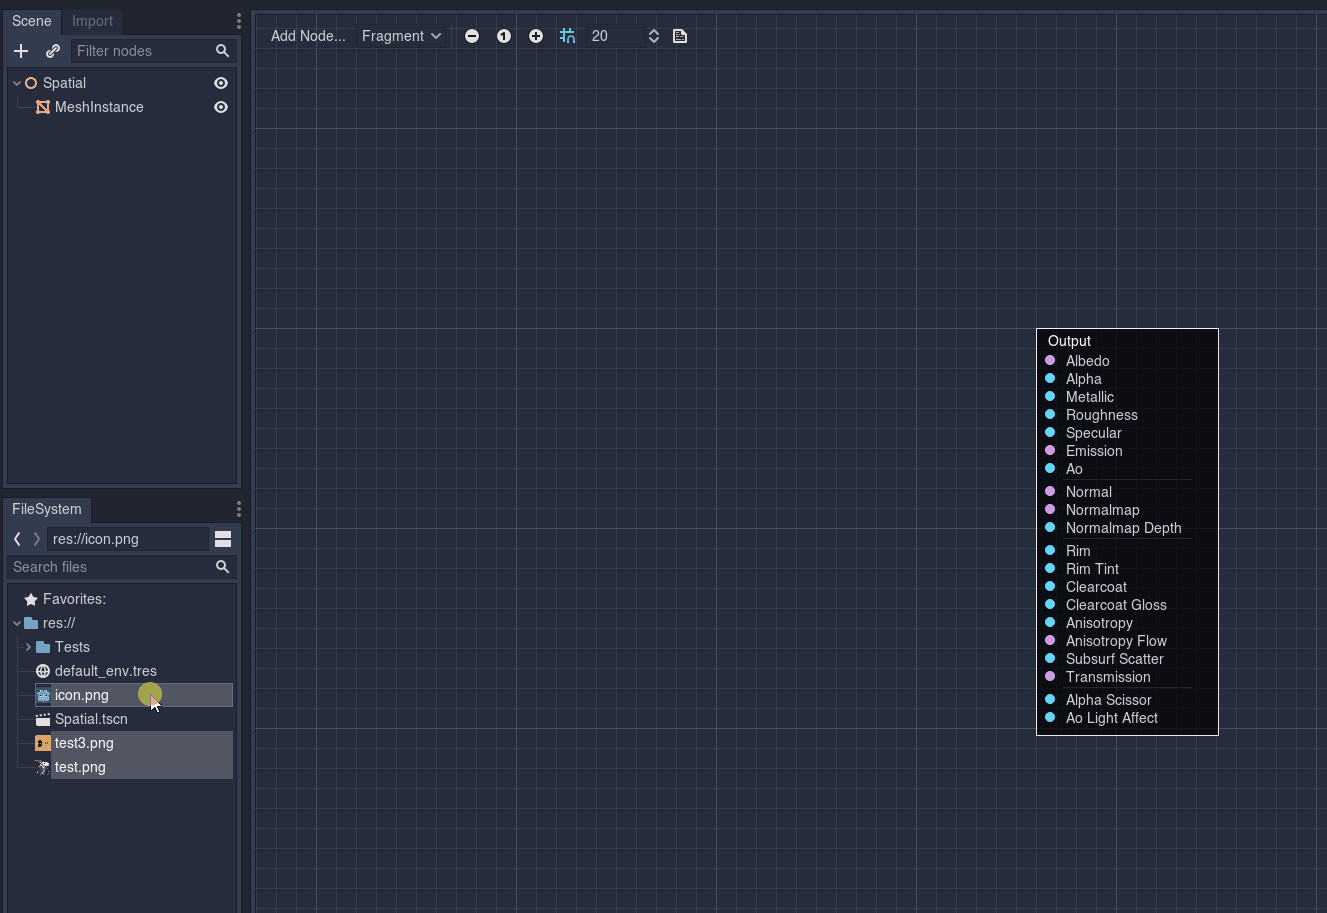
You can even drag & drop them to the graph from the FileSystem dock:
Copy/paste
You can now copy/paste nodes within the graph or between graphs (vertex/fragment/light). Use Control+C/V combo as usual. It works even for complex nodes such as Expressions. The result will be posted under the cursor hotspot.
Auto connection
When dragging the connection line from a port to an empty location, the node creation dialog will appear and if you use it to create a node, it will be automatically connected to that port.
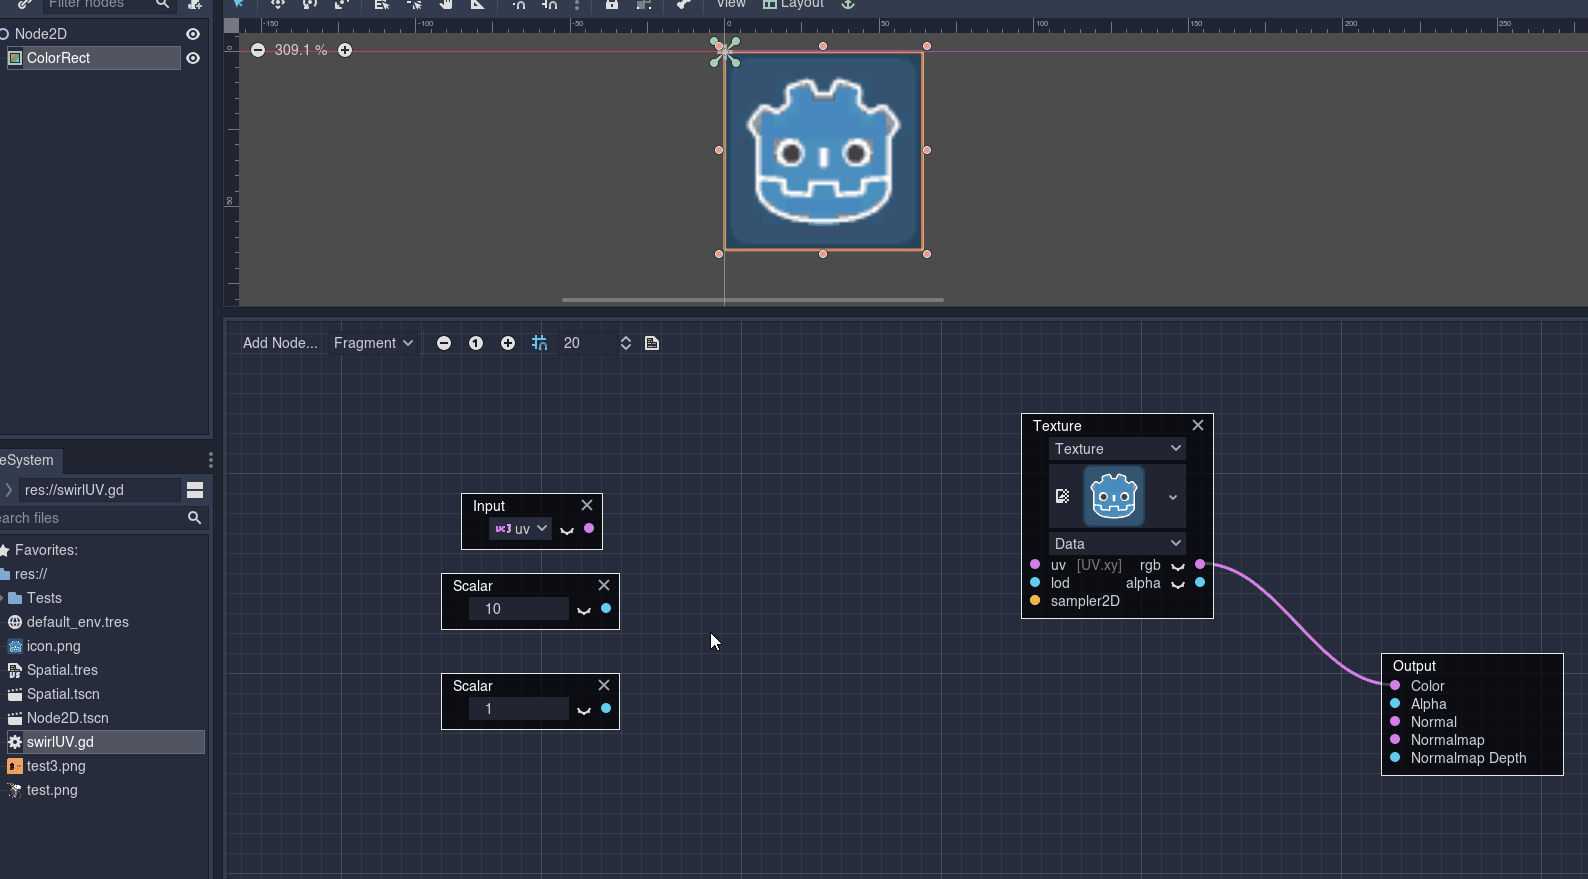
Drag & drop textures from FileSystem
You can now drag textures from the FileSystem dock to the graph. This will automatically create a Texture node with the associated texture for each dragged texture.
Converter from VisualShader to Shader
You can now convert visual shaders to shader scripts.

Note that the conversion is unidirectional, it’s not possible to convert script shaders to visual shaders. So make a copy or duplicate your visual shader before conversion if you want to preserve it for further changes in visual shader editor.
Generated shader preview
This panel can be opened by pressing the shader preview button, which adds a new panel showing the generated shader script corresponding to your visual shader graph.
It shows the final code and if any error is generated, the corresponding line will be highlighted. The code can be selected and copied from this panel, but not edited.
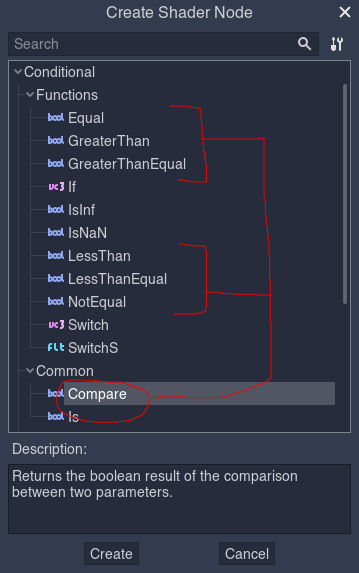
Compare node
Compare is a more powerful version of If - you may compare scalars, vectors, boolean and transforms, for any comparison operation. It is located under the Conditional tab in the members tree:
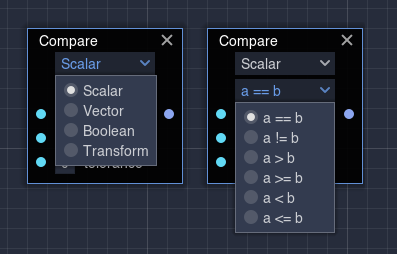
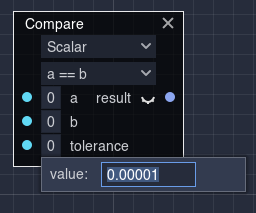
In scalar comparison you may define its tolerance:
In vector comparison you may compare whether all of its components are equal or any of them:

Boolean and transforms may only be compared for equality or inequality.
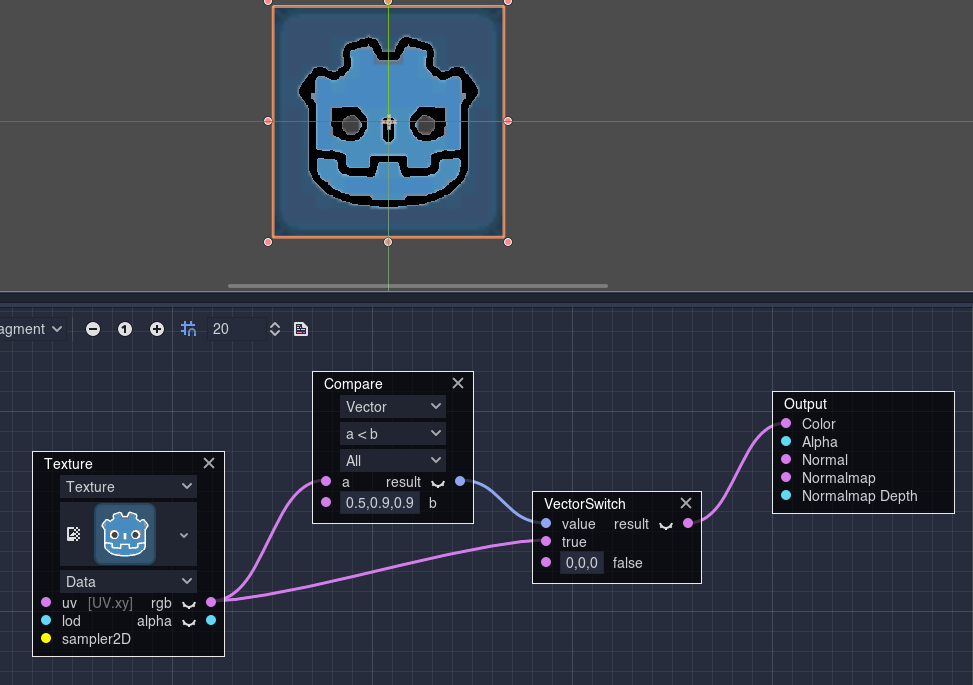
This node is perfectly designed to be used with the Switch node, since it accepts a boolean output from this node.
Be careful not to use it too frequently since it may significantly decrease the shader performance.
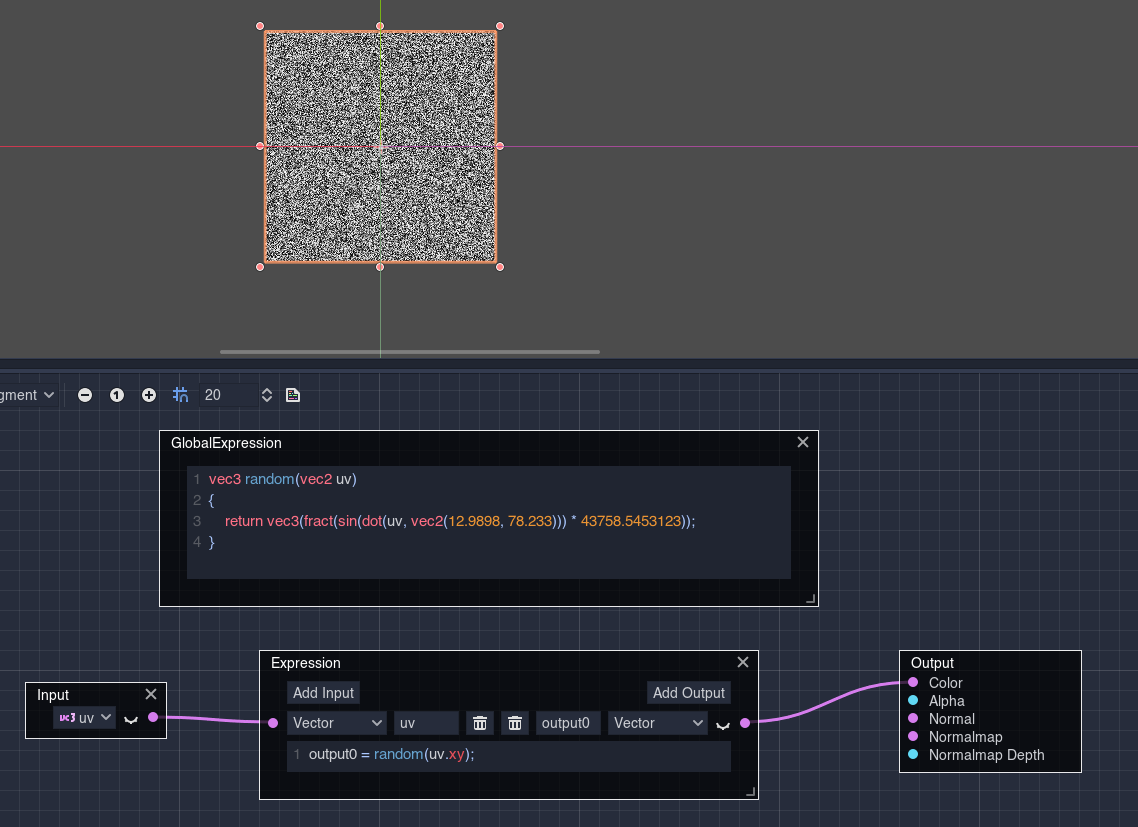
Global expressions
You may define custom global code in these expressions. It will be added on top of the generated shader and can be used in standard Expressions:
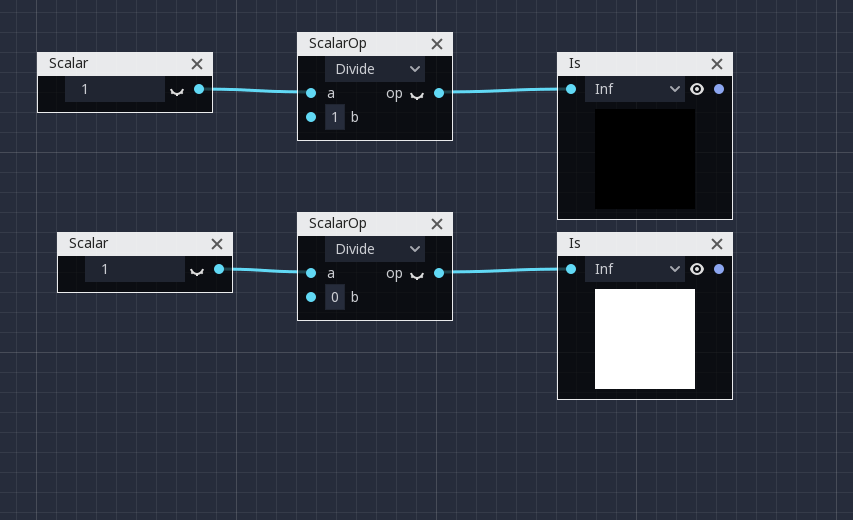
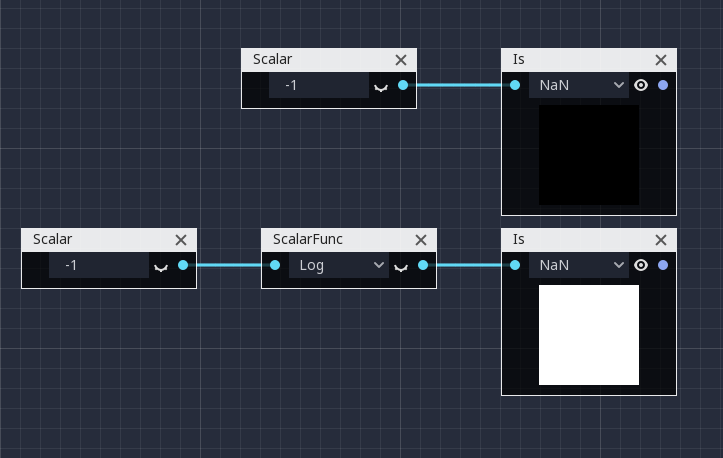
Is
This Is node is used to check whether the scalar variable is INFINITY or NaN.
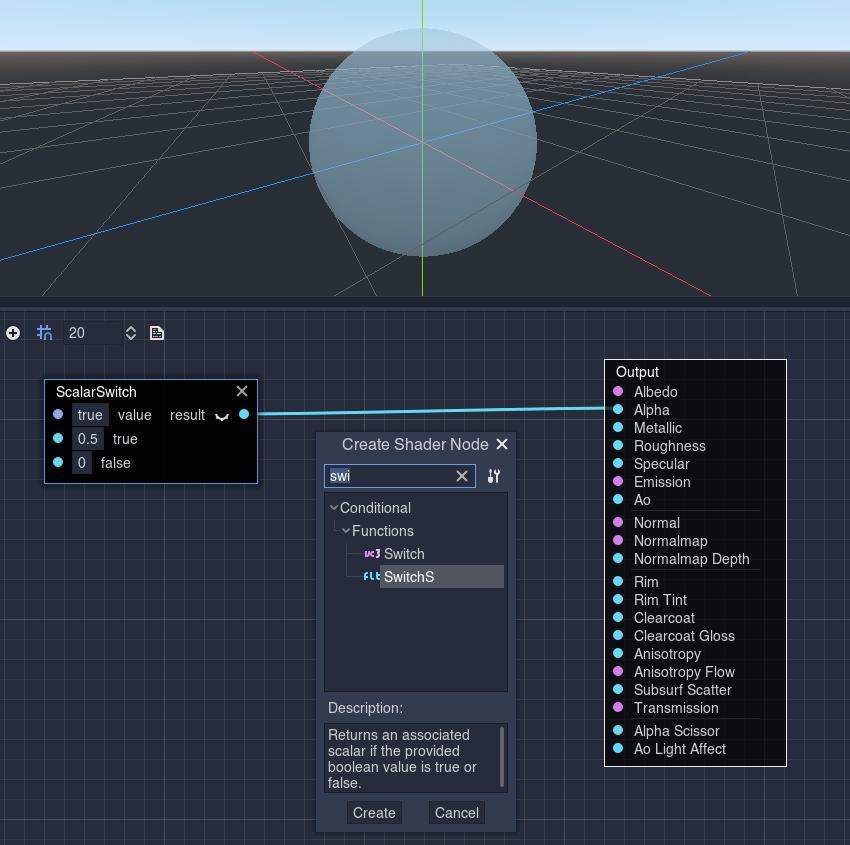
Switch for scalars
Boolean switch to choose from one of the scalars depending on the boolean value. Be careful not to use it too frequently since it may significantly decrease the shader performance.
Default UV parameter for Texture
The Texture node’s uv input port no longer requires to be connected to a UV node - it is used internally by default!

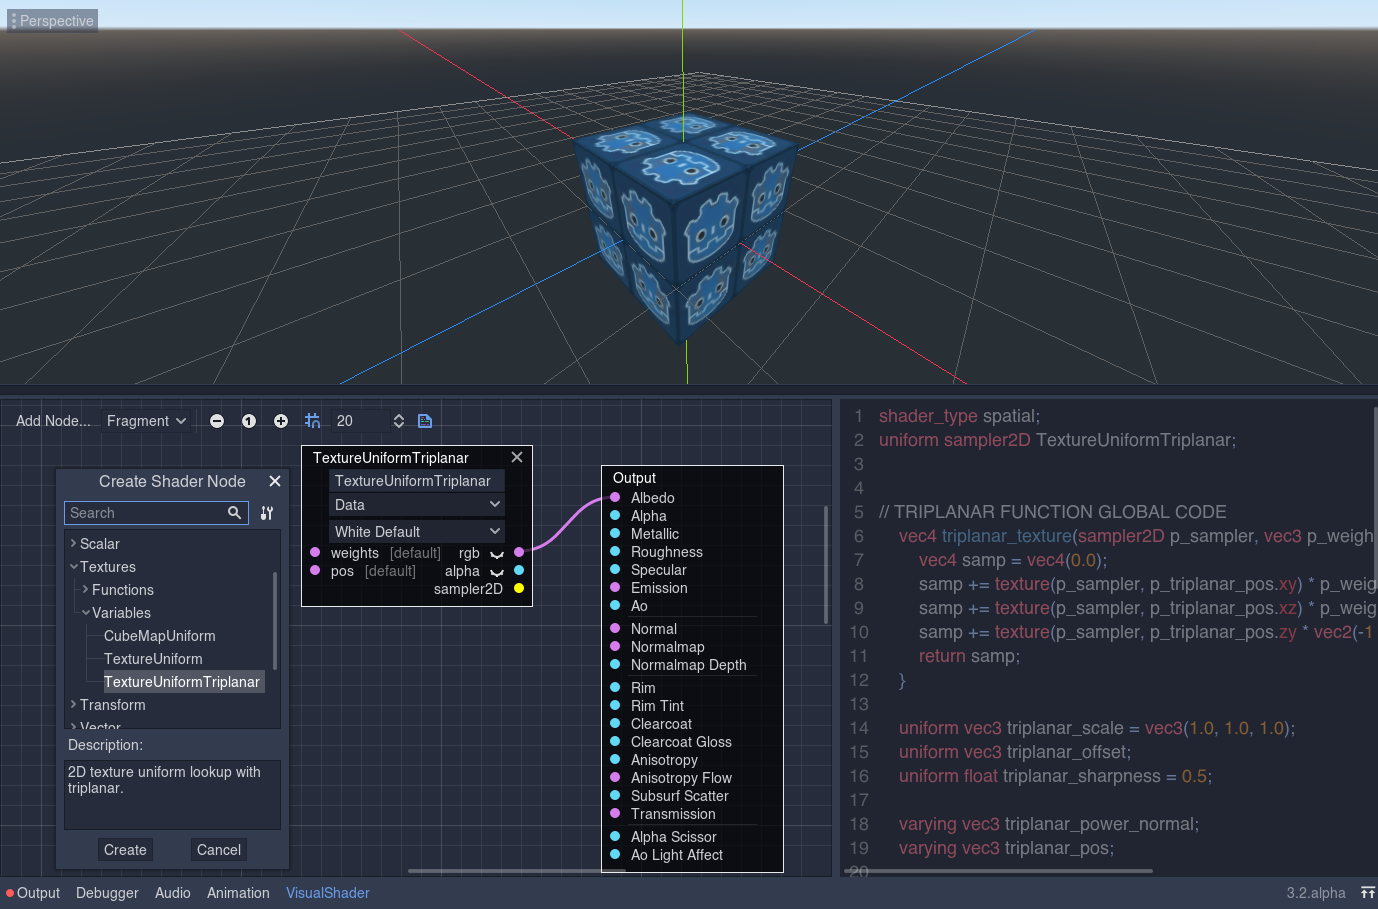
TextureUniformTriplanar
This TextureUniformTriplanar node is available only in Spatial shaders in the fragment function. Parameters weights and pos are overrides by default. It’s a big, complex function as you can see in the generated code panel.
Sampler type
The Sampler type was most recently added, to help developers with handling texture samplers. Internally, it is a name reference to an existing uniform or pre-defined sampler input.
The texture uniforms get a new port that returns it. To use it, you can connect it to a Texture, Expression or custom node with the allowed port. If you connect it to a Texture node, the new SamplerPort option must be used to handle the input from the sampler.

Since it’s just a name reference and shaders cannot pass them to local variables, the Expressions can accept sampler but cannot return them (at least for now).
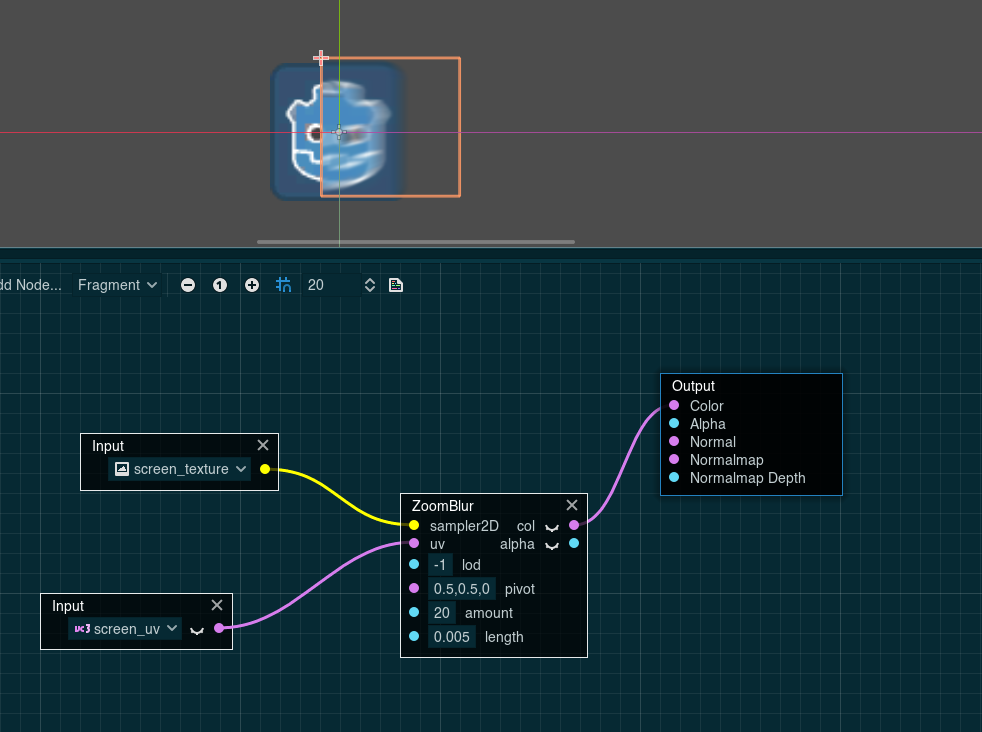
I’ve also added predefined samplers such as ScreenTexture, Depth or Texture (Texture2D for CanvasItem shader type).
They can be used with custom nodes or Texture:
Summary
Godot provides an awesome layer for graphics developers, and with provided changes it can do many new things in an easier and better way. For 4.0, I hope to continue enjoying myself and make shader fun more accessible by providing new enchancements and feature proposals.
If you like my work and want to support me, I’m happy to receive donations (see relevant options on my GitHub profile).
Thanks Arkology for providing examples of custom visual shader nodes. You can download his VisualShader plugin on GitHub.