Like in previous years, Godot is participating again in the Google Summer of Code program for its 2021 edition.
We selected 5 projects back in May, and the 5 students and their mentors have now been working on their projects for almost two months. We omitted to announce the projects formally (sorry about that!), but this first progress report written by each student will make up for it by giving a direct glimpse into their work.
Here are the 5 projects/students with links to the relevant sections in this post:
- Implementing a DAP backend for debugging Godot projects by Ricardo Subtil (Ev1lbl0w)
- Adding pseudolocalization to Godot by Angad Kambli (angad-k)
- Improvements to Godot’s soft-body dynamics by Jeff Cochran (jeffrey-cochran)
- Automated graph layout in VisualScript & VisualShader editors by Umang Kalra (theoway)
- Command palette for the editor by Bhuvaneshwar (Bhu1-V)
They’ve all been doing outstanding work so far, and we’re looking forward to integrating all those changes in the engine.
Implementing a DAP backend for debugging Godot projects
- Project: Implementing a DAP backend for debugging Godot projects
- Student: Ricardo Subtil (Ev1lbl0w)
- Mentors: Fabio Alessandrelli (Faless) and Joan Fons (jfons)
- Branch:
Ev1lbl0w/gsoc21-dap - PR: #50454
Introduction
A lot of developers prefer to use their familiar tools when it comes to writing and debugging code. Before, this was an Alt+Tab experience where developers had to constantly switch between Godot and their external text editor, which was very distracting and cumbersome. With the implementation of LSP (Language Server Protocol), Godot now communicates with the text editor to provide code completion, symbol lookup, and documentation right at your fingertips, greatly improving the workflow.
For debugging projects, Microsoft also developed a similar protocol, the DAP (Debug Adapter Protocol), that allows debugging projects from the comfort of your tools as well. My task is to adapt Godot to support this communication protocol, thus further improving the experience for developers working with their “native” tools.
Current progress
Most of the basic commands defined in the DAP specification have been implemented (#50454):
- Launching a debuggee (the application we debug) from the text editor, and terminating it (
launch/terminate). - Pausing and continuing the debuggee (
pause/continue). - Stepping the code, and stepping in function calls (
next/stepIn). - Setting breakpoints (
setBreakpoints). - Exceptions from bad code, such as syntax or runtime errors.
- Stacktrace and scope information, along with variable values (
stackTrace/scopes/variables).
With these, you can already start debugging projects with your text editor of choice. Since DAP is a platform-agnostic protocol, it also shouldn’t require any custom plugins or anything of the sort; just point your compatible editor to the right port (6009 by default), and you’re good to go!
For VSCode, here’s a launch.json config I’m using for debugging my work (needs godot-vscode-plugin installed as well):
{
	"version": "0.2.0",
	"configurations": [
		{
			"name": "Debug (DAP)",
			"type": "godot",
			"request": "launch",
			"project": "${workspaceFolder}",
			"port": 6007,
			"debugServer": 6009,	// DAP port; if you change this in Godot settings, you must change this one as well
			"address": "local://127.0.0.1"
		}
	]
}
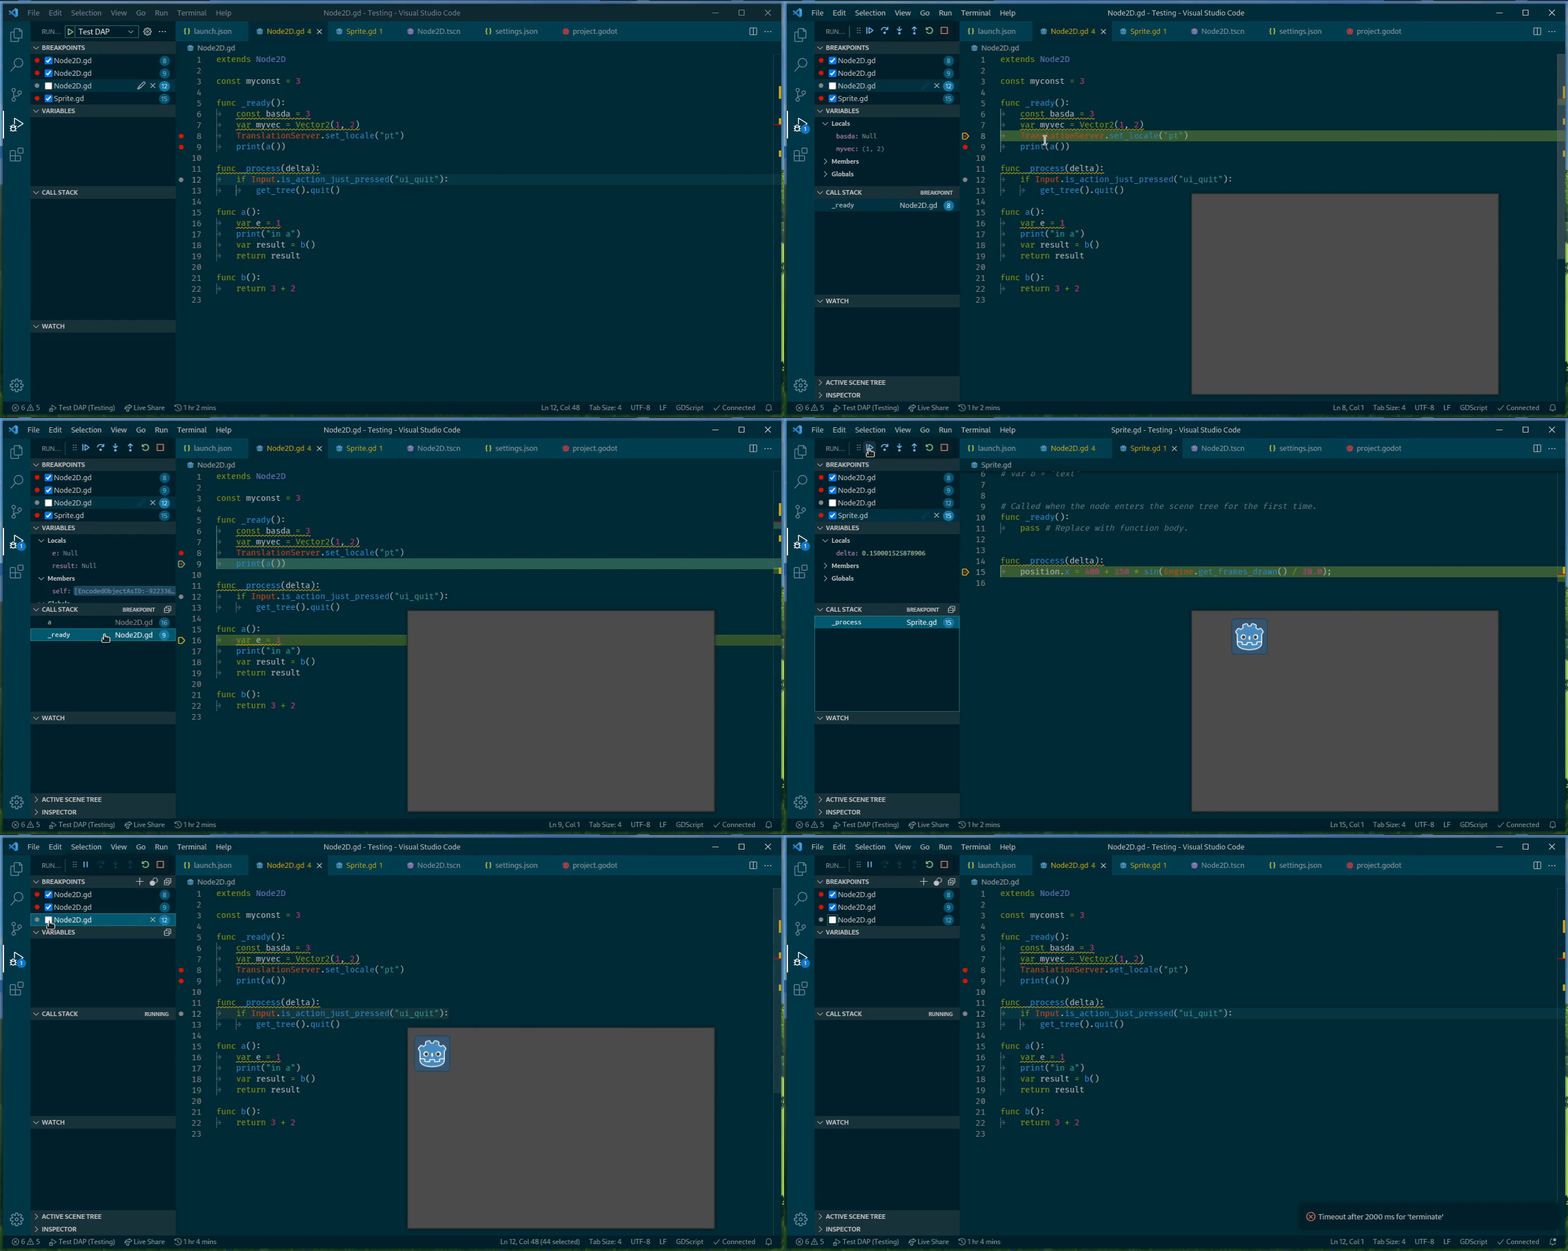
Implementation-wise, building the backend was sometimes simple, sometimes challenging, but overall a very rewarding experience, as this is my first time contributing features to the Godot Engine, and not just occasional bugfixing. Since both these protocols were developed by Microsoft, a few things are very similar, so I was able to jump start my code from the LSP implementation.
A lot of requests are very simple: parse any arguments there might be, call a few functions, and return a response packet. In that aspect, the challenge was mostly figuring out how the engine works under the hood, and finding the right methods to call. Interestingly, a lot of those methods are callbacks for UI elements; thus, the behavior from DAP should be very similar, if not exactly the same as clicking on those UI elements.
For reporting stacktrace and variable information, the DAP uses an ID system for all of these: each stacktrace has an ID, each scope another ID, each variable has one unique ID too, etc… Since Godot doesn’t have anything of the sort, I have to then create a separate list of this information, and transform it into something DAP can both query and understand. From my tests so far, the system is working fine, but still needs more work for better displaying complex objects (for example, showing the XYZ values of a Vector3, elements inside an Array, RGB values of a Color, etc…).
For testing the protocol implementation, I’ve been using VSCode. Since this text editor is basically the reference implementation of how LSP and DAP communicate, I’m hopeful it will work well on other text editors.
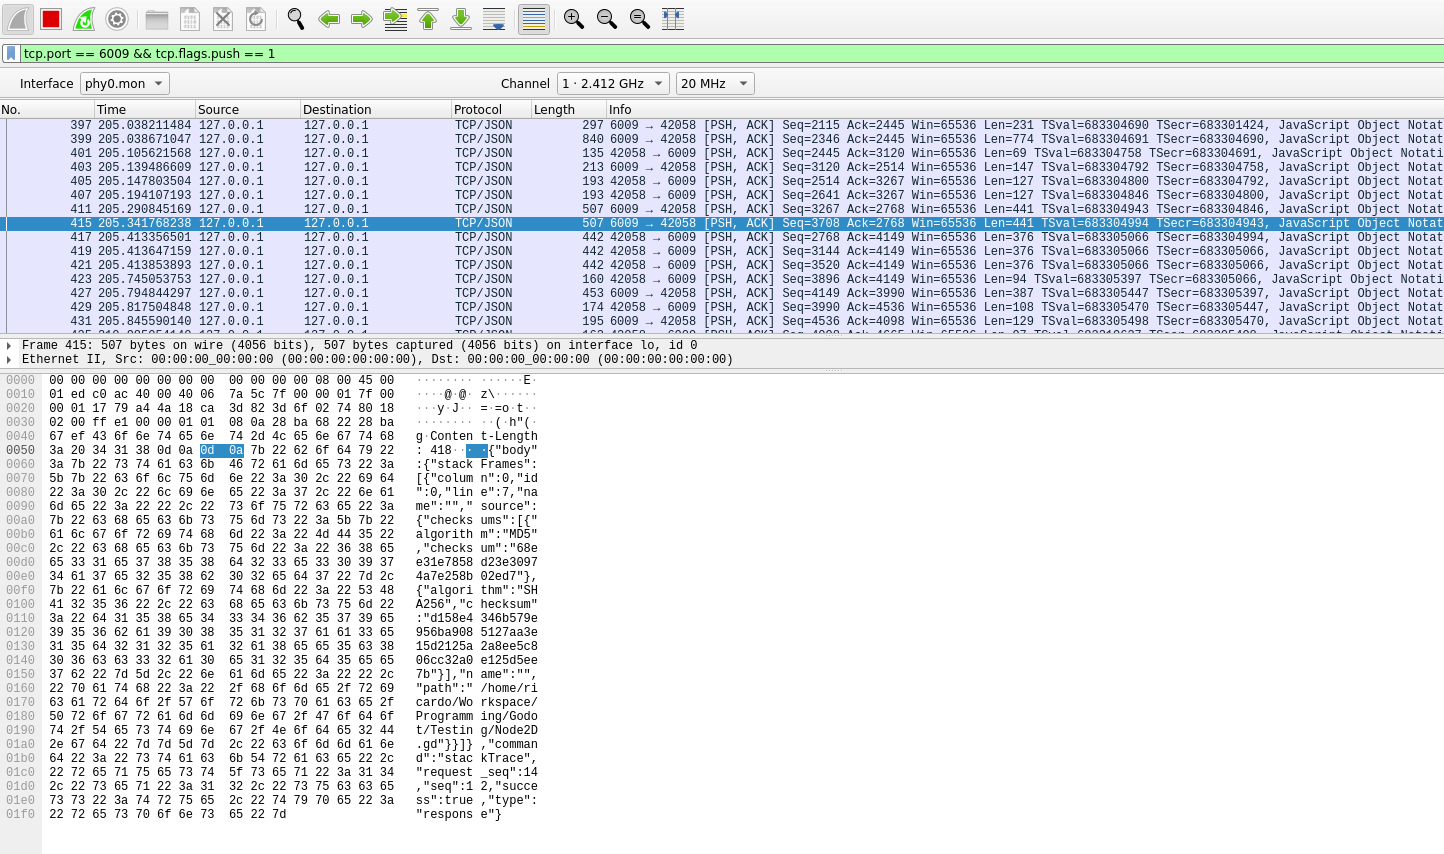
Alongside it, I found out Wireshark (a FOSS tool for analyzing network communications) to be extremely useful for seeing the raw communication between Godot and VSCode, allowing me to read by hand if the packets sent are according to the spec, as well as helping me debug issues between communication:
Next steps
Now that most of the necessary functionalities are implemented, the remaining “checklist” will focus on finishing up details:
- Implementing a few more requests/events that Godot can support, as well as allowing Godot specific actions (e.g. getting the live scene tree).
- Polishing and syncing interactions between the Godot editor and the text editor.
- Bugfixing and testing under more projects, more text editors, more platforms, etc…
Adding pseudolocalization to Godot
- Project: Adding pseudolocalization to Godot
- Student: Angad Kambli (angad-k)
- Mentors: Rémi Verschelde (Akien), Michael Alexsander (Yeldham)
- Branch:
angad-k/pseudolocalization - PR: #49361
Introduction and project overview
Hey there! I am Angad Kambli, a CSE undergrad at IIT Roorkee. I have been working on adding pseudolocalization to Godot as a part of Google Summer Of Code ‘21. Before getting into what pseudolocalization is, let me show you what pseudolocalizing a piece of text looks like.
Input:
The quick brown fox jumped over the lazy dog.
Output:
[Ŧh̀éé q́üüííćḱ ḅŕôôŵή f́ôôx́ ǰüüm̀ṕééd́ ôôṽééŕ ŧh̀éé łááźý d́ôôǵ.]
So, what does this achieve? How would transforming text into this cursed looking output be beneficial?
Well, this is pretty useful in improving the internationalization workflow for big projects. For projects catering to people from various backgrounds, supporting multiple languages might be important, and with that, comes the need for the project to be robust enough to not break when using different locales.
Now, translations for the project might not be available during development leading to problems in internationalization not being detected until very late. This is where pseudolocalization comes in: it simulates localization so that the project’s robustness when it comes to changes in locale can be checked regularly during development and any problem regarding that can be detected early on. In the next section, I’ll list out some of the features I am including as part of pseudolocalization and their benefits.
Features
Following are the options that can be set through both the project settings and GDScript. These options can be toggled separately and can be configured as per the needs of the project.
- Accents: Replacing the normal character with accented variants helps in simulating the various characters that might be introduced during localization and also helps to check whether the selected font can support such special characters.
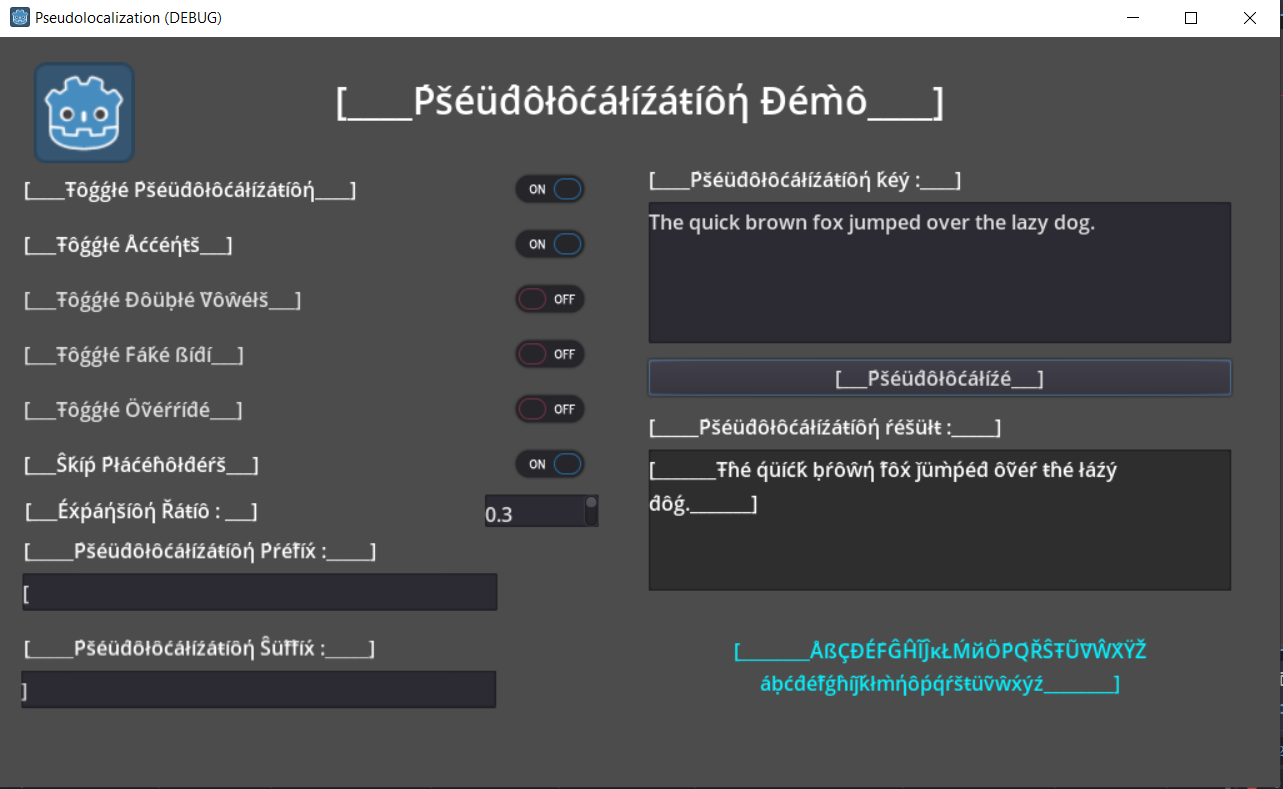
- Text Expansion: The text might expand during localization and to simulate that, I have included two options, one is to simply double the vowels and that sufficiently simulates text expansion. The other option is to expand the keys by a given percentage using underscores.
- Fake Bidi: Some writing systems like the Arabic script use a Right-To-Left system. This can be simulated by forcing RTL text by wrapping the text in some specific Unicode characters, to support bi-directional text.
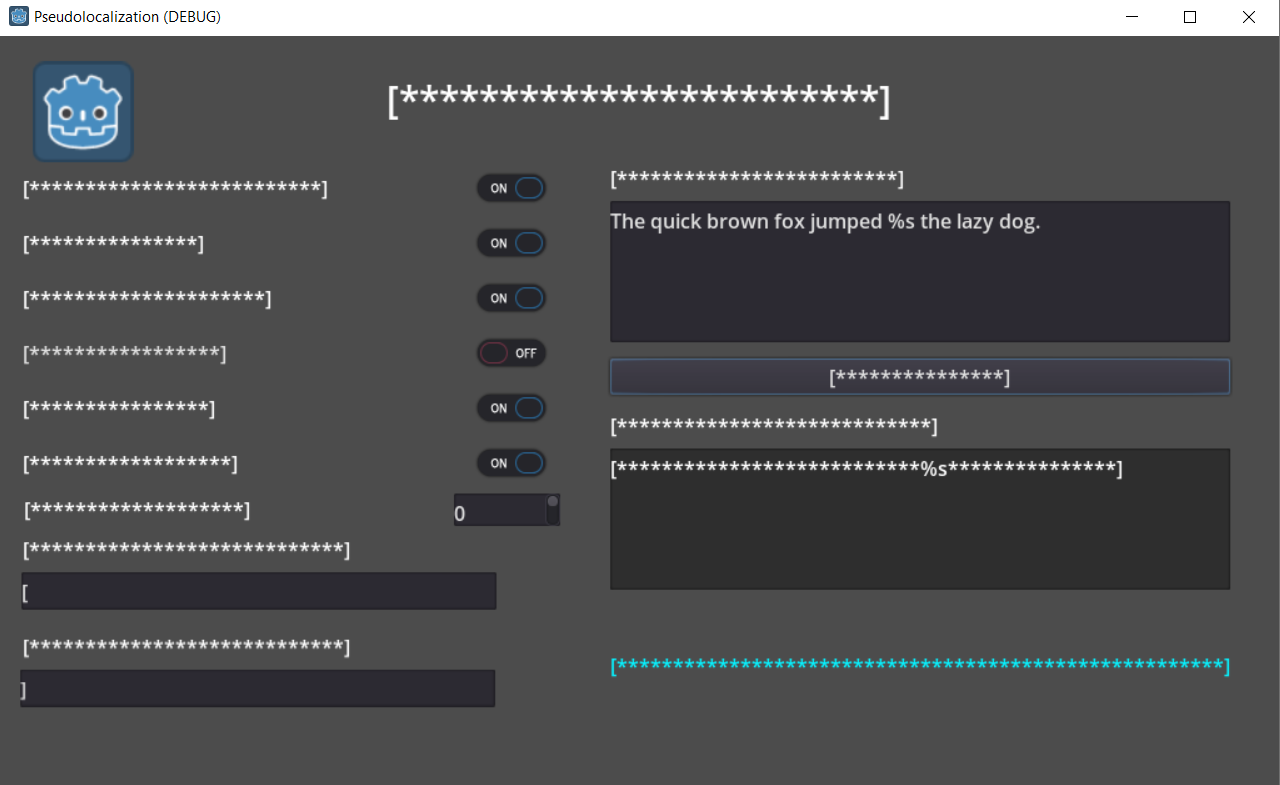
- Override: Now, turning on pseudolocalization and going through the project can already help you find strings that are untranslatable. However, the override option, when enabled, replaces every character in translatable strings with a ‘*’ thus making it very easy to find strings that are not getting localized.
- Skipping placeholders: People might want to know places where, due to insufficient arguments, placeholders like
%sare being rendered without being replaced. This option enables them to skip pseudolocalizing string formatting placeholders like%s. - Prefix and suffix: Strings are wrapped in a prefix (default:
[) and suffix (default:]) to clearly see where a key starts and ends. This is important to see if any keys are getting wrongly clubbed together.
The demo project
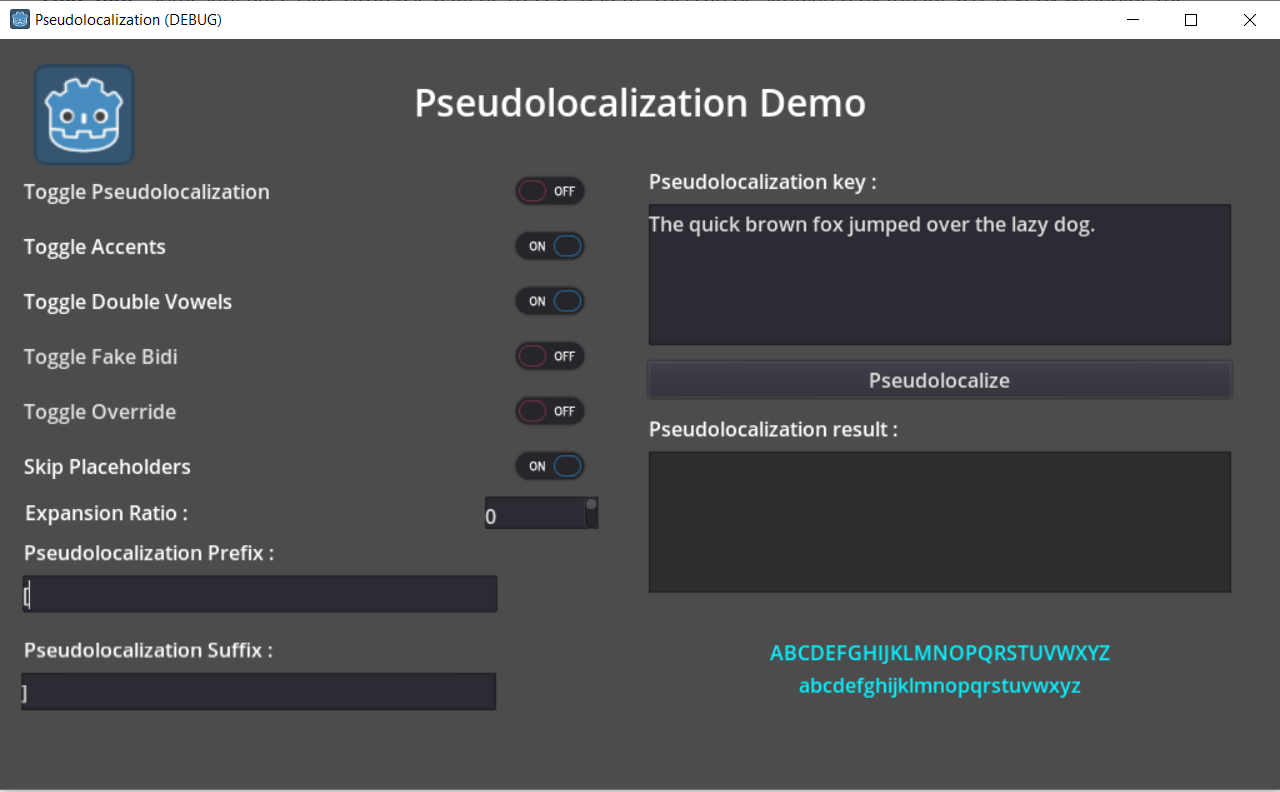
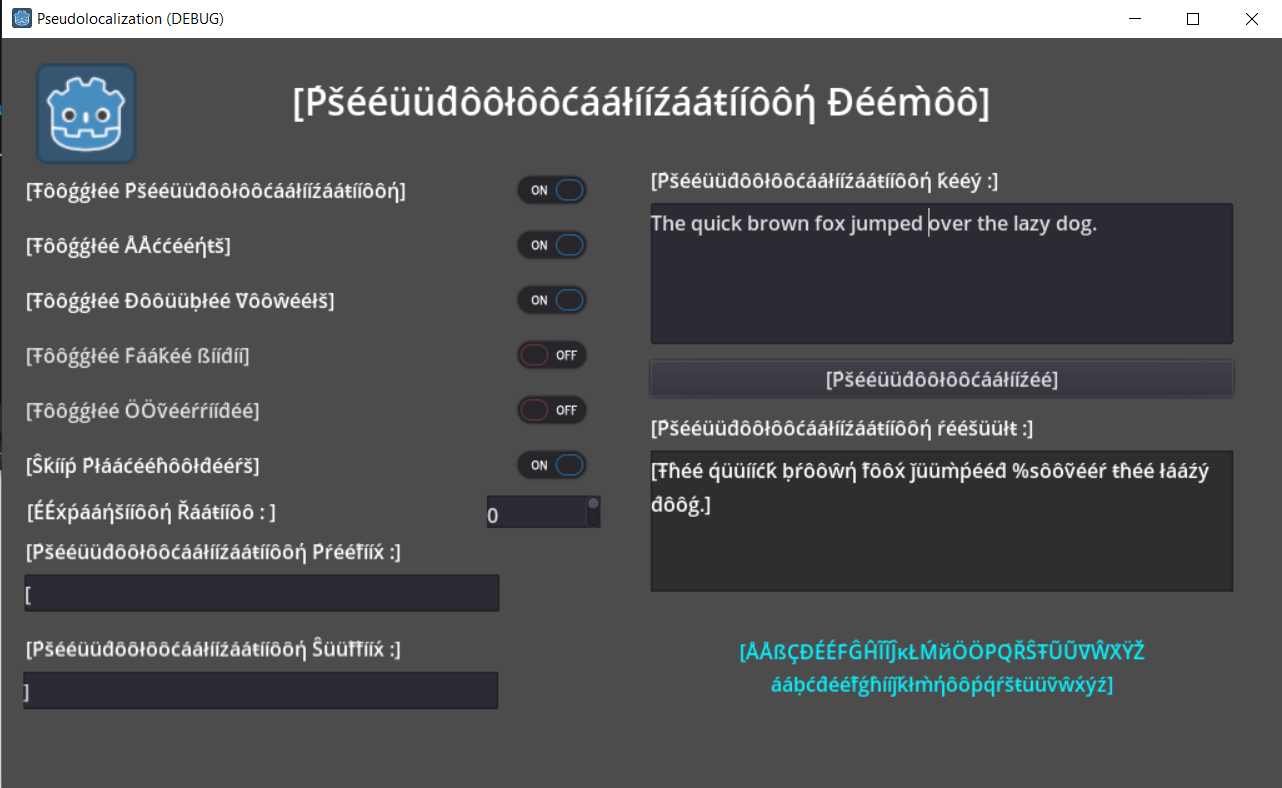
For testing purposes, I have set up a demo project which can also work as a project for someone who wishes to try out all pseudolocalization features, much like this project for internationalization. Here are few screenshots from the project that also showcase pseudolocalization in action:
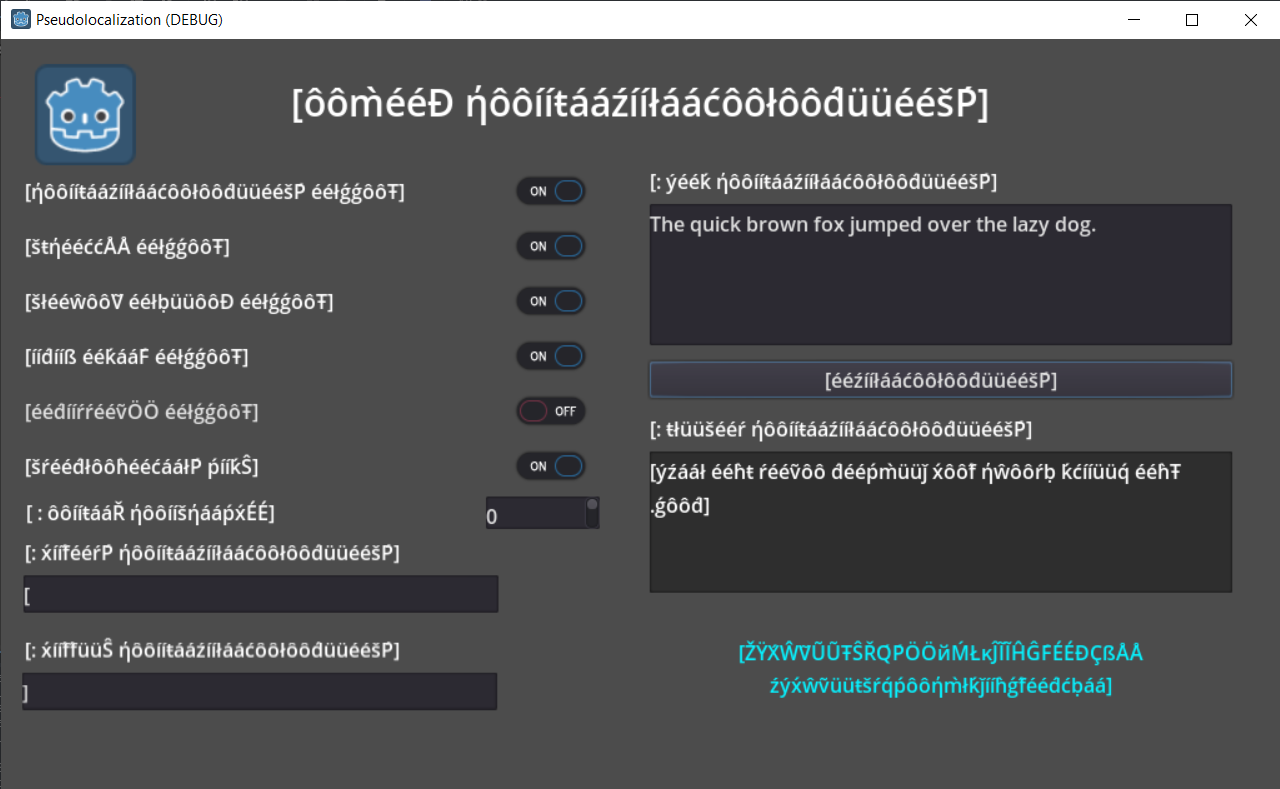
Pseudolocalization disabled:
Accents and double vowels enabled:
Fake Bidi enabled:
Expansion ratio set to 0.3:
Override enabled. Notice how the “%s” is skipped:
Current progress
I am pretty much done with the main pseudolocalization flow. All the options are implemented and they can be toggled through both project settings and GDScript. I also added an option in the Editor Settings to enable pseudolocalization in the editor, which can be useful for Godot translation contributors. I’m now working on the documentation and including the demo project in the official demos. After that the project should be complete!
Further reading
If you are interested reading up more on pseudolocalization, here are a few links I found helpful while researching for it:
- This Google Open Source article pretty much covers everything about pseudolocalization and its use cases.
- This Netflix article is a pretty interesting read on how pseudolocalization is employed in an actual development setting.
And that’s it! Thanks for reading.
Improvements to Godot’s soft-body dynamics
- Project: Improvements to Godot’s soft-body dynamics
- Student: Jeff Cochran (jeffrey-cochran)
- Mentor: Camille Mohr-Daurat (pouleyKetchoupp)
- Branch:
jeffrey-cochran/softbody-areas - PR: #50785
Project description (Synopsis)
Deformation is one of the most ubiquitous and recognizable physical phenomena: trees swaying in the breeze, a bouncing ball, someone poking the Pillsbury doughboy. This familiar behavior can make all the difference to an immersive gaming experience. Simulating this behavior in real-time often falls within the domain of soft-body dynamics, for which Godot provides support in 3D.
After discussion with Camille Mohr-Daurat (pouleyKetchoupp), I have decided to focus my attention on two specific, feasible tasks that would improve soft-body dynamics in Godot:
- [Issue #36693] Enable area detection and the application of custom gravity for soft bodies.
- [Proposal #2591] Enable the application of wind-like forces to soft bodies.
The first task will resolve a discrepancy between those features offered for rigid bodies and those offered for soft bodies. Currently, one can override the gravity vector in an area occupied by a rigid body and see it faithfully applied to the rigid body. This fails for soft bodies, which ignore the change in gravity.
The second task will introduce a new object for the simulation of wind. The jet-force object will allow one to specify, much as one might for a camera, a location (origin) and direction of the jet. Additional parameters include jet strength and jet attenuation, which describes how the force decays with distance.
These two tasks are interrelated in that they both focus on the application of forces (body and external) to soft bodies, and I hope that their completion will illuminate a more general pattern by which this is best accomplished for future soft body improvements.
Overview and progress
The first thing I’ve done is create a simple scene for use as a test case. The scene has a single soft body cloth with a coarse mesh that is fixed along one edge. Global gravity is applied in the negative Y direction, and an area is created encapsulating the cloth to allow for the specification of a new gravity vector that overrides the global gravity, instead acting in the positive Y direction.
To correctly apply the new gravity vector, the narrow phase collision detection routine in Godot must be modified to account for soft body / area intersection and to send notifications when this occurs. Then the motion prediction for soft bodies must be modified to account for all areas affecting it.
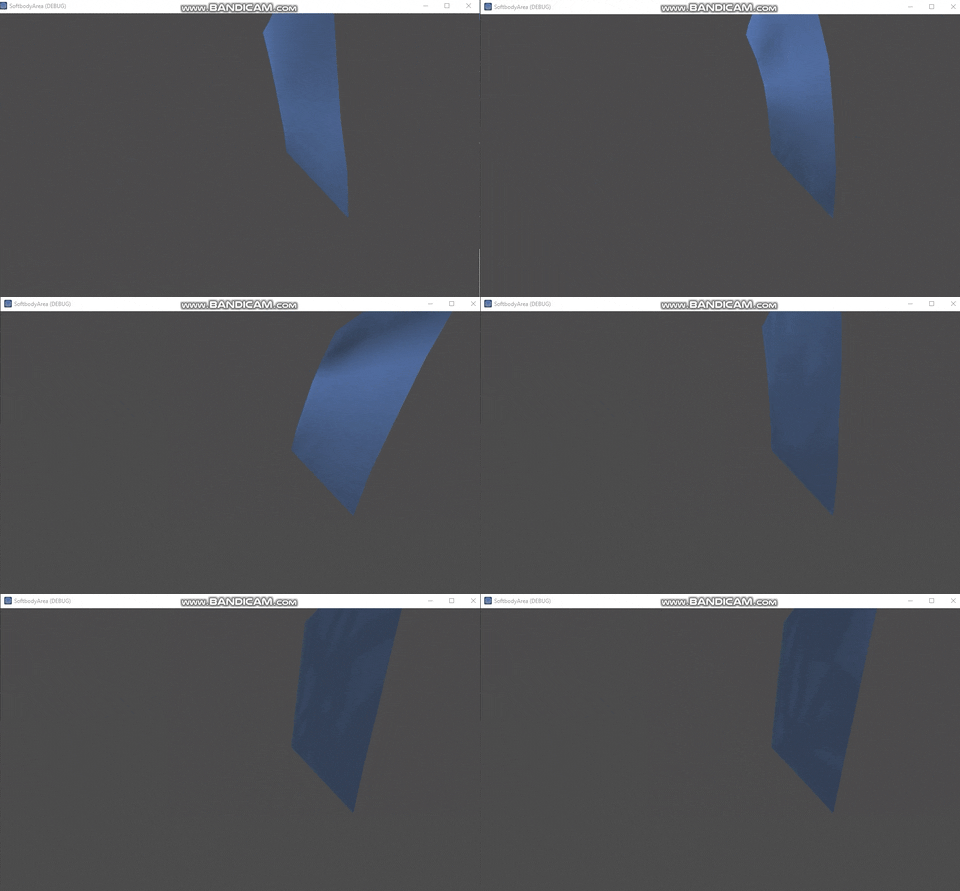
I have completed these tasks, and the result is a cloth that falls upward despite a downward global gravity:
The PR for this improvement can be found at this link.
What’s next
Next I’ll complete the addition of a new wind-like force. The implementation will, as a first pass, use areas in much the same way that modified gravity does. The primary difference will be the force model, which requires a variety of different parameters. The end result will look like this simulation I’ve created here: Wind-like Force Simulation.
Automated graph layout in VisualScript & VisualShader editors
- Project: Auto-arrangement of nodes in GraphEdit, VisualScript and VisualShaders
- Student: Umang Kalra (theoway)
- Mentor: Ernest Lee (iFire)
- Branch:
theoway/node_auto_arrangement_graph_edit - PR: #49343
- Proposal: godot-proposals#1253
Introduction
Godot provides a lot of tools for game and graphic designers that can get the job done without worrying about coding! Two such powerful features are VisualScript & VisualShaders. The users can automate and customize scenes and write shaders according to their needs, using a graph-based visual editor.
Nonetheless, at some point everyone has experienced the overall layout of their script/shader graph getting very complicated and hard to manage. As more functionality is added by the user, the resulting canvas(es) gets filled by nodes and connections, making it hard to keep track of things. This project aims to add a feature that automatically organizes the position of nodes in the VisualShader & VisualScript editors or any other module built on top of GraphEdit.
Project overview & current progress
Arranging nodes in a graph is a complex problem, both in terms of computation and achieving a user-friendly layout. Many methodologies have been formed over time, but the most popular choice for building a graph layout has been Sugiyama’s methodology. This project is correspondingly based on this methodology. Since the VisualScript & VisualShader editors are both based on GraphEdit, this feature has been implemented in the core GraphEdit node. To accommodate Godot’s default GraphNode features, such as variable sizes of nodes along 2 dimensions, having multiple input/output ports, etc., various changes have been made to this methodology. The purpose of having this feature is to give users the flexibility to auto-arrange the nodes in a layout with organized node groups, having minimum tangles in connections (edge-crossings!). The algorithm is designed to work well on large graphs and give a layout that has been scaled according to the zoom set by users in their graph editors.
After discussing with the users, I’ve made some design changes in the draft PR. Only the nodes selected by the user are rearranged. A keyboard shortcut has been added to the VisualScript editor, and an option has been added in the menu of the VisualShader editor, which will call this feature and work on the selected nodes. Currently, the code is able to produce a layout with horizontal grouping of nodes such that all the connections inside the horizontal block are drawn straight. These horizontal blocks are then compressed vertically to get a compact layout. Also, undo/redo functionality has been enabled which uses the undo/redo stack of the VisualShader or VisualScript editor respectively. Here’s a short demo of the feature:
What’s next
The next goal is to make the whole layout compact and getting rid of overlaps that occur between nodes in the same block. After testing it out on large graphs in both the VisualScript and VisualShader editors, and merging the feature in master, I’ll be adding the functionality to bind the nodes together in a comment node, so that when a comment node is moved, the nodes enclosed by it should also move with it intuitively, which is something currently missing in Godot.
Also, making this functionality work with the node auto-arrangement feature is on my to-do list. So, you can expect quite a few features coming up in the VisualScript and VisualShader editors.
Command palette for the editor
- Project: Command palette for the editor
- Student: Bhuvaneshwar (Bhu1-V)
- Mentors: Gilles Roudière (groud), Hugo Locurcio (Calinou), Tomasz Chabora (KoBeWi)
- PR: #49417
Introduction
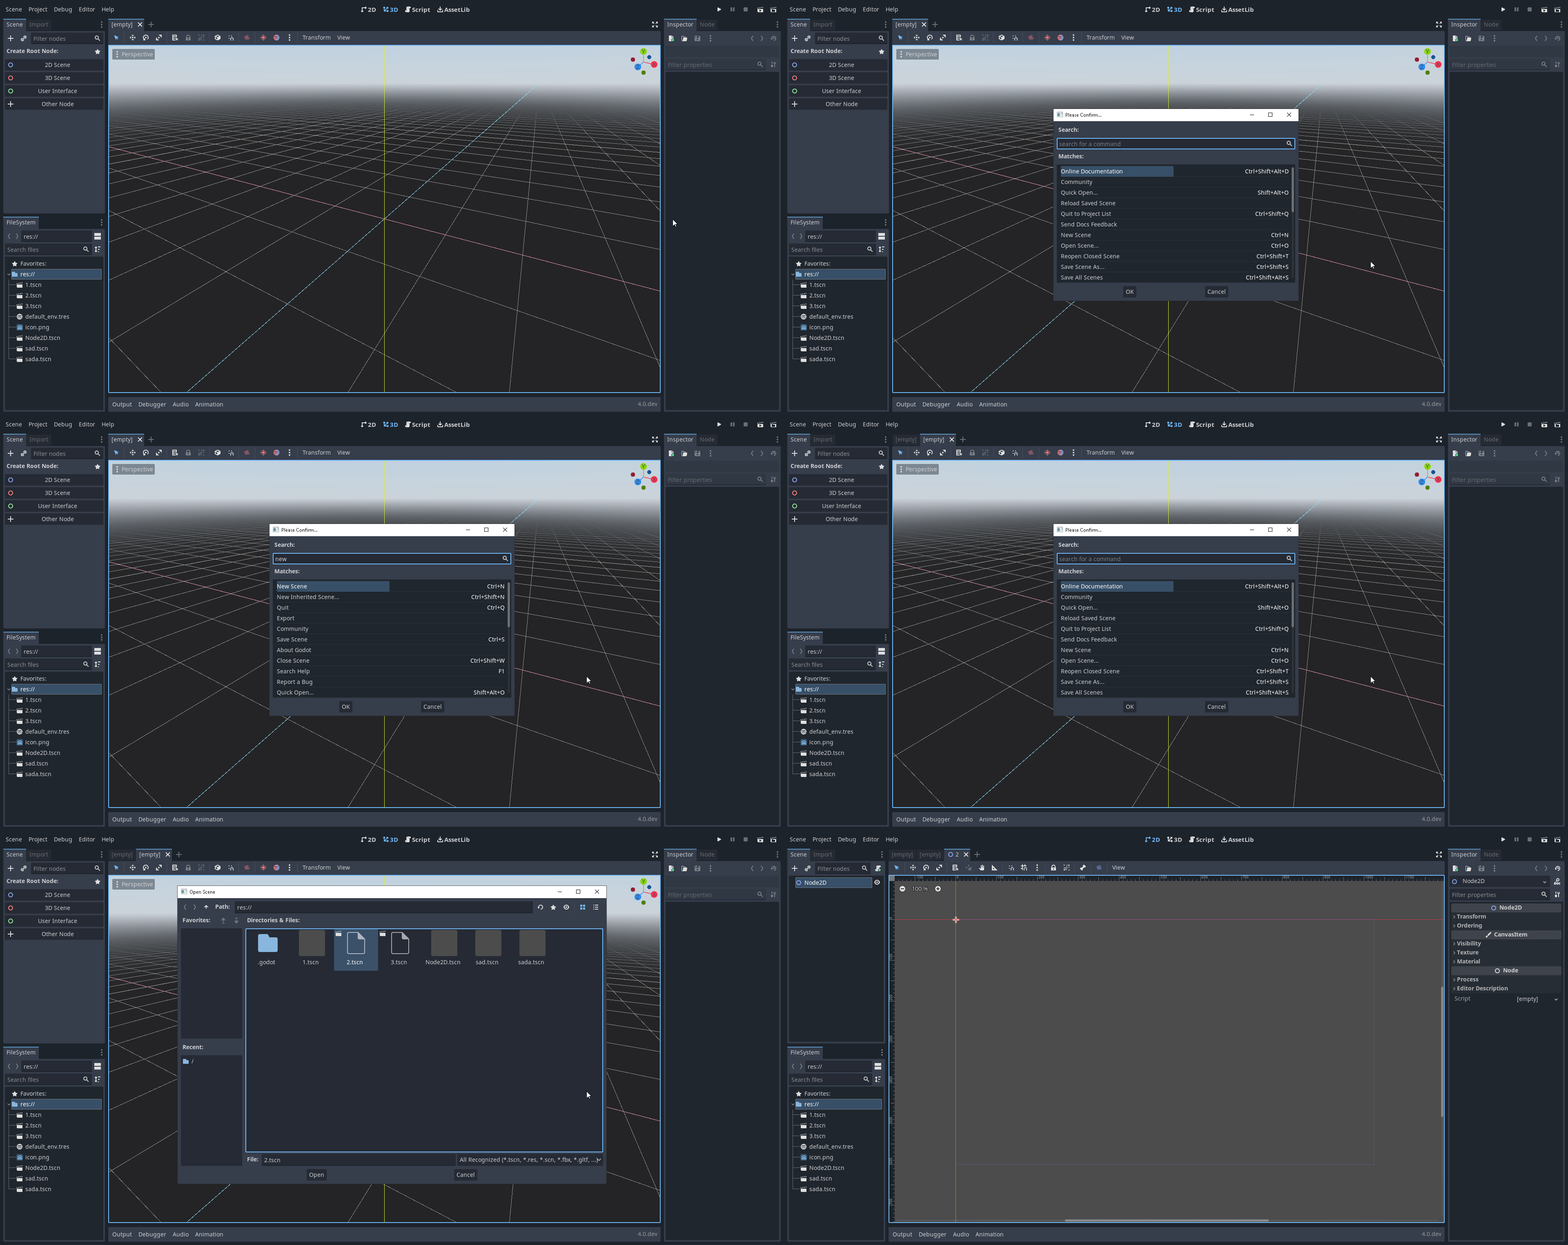
The Command Palette provides a quick way to access commands that don’t have a key binding or would usually be hidden away in a menu.
Features commonly found in command palettes:
- A single shortcut to invoke the palette.
- A fuzzy matcher to find commands.
- A way to see the direct shortcuts for next time.
Current progress
My initial proposal was to build upon the draft PR Add an editor actions API #47002 and use it to register command palette commands, which are searchable and executable from a command palette dialog. But after some discussion with my mentors we decided to use a new InputEventShortcut, which inherits InputEvent and would hold a reference to a Shortcut, i.e. a mapping between a keyboard input and a function.
So the idea is to register editor actions by creating an InputEventShortcut object for all the necessary actions and create a callable for the function Viewport::unhandled_input() and pass the created InputEventShortcut object as the argument. All these callables (commands) are stored in a HashMap with their shortcut_path as key. The Viewport::unhandled_input() function has also been edited to handle InputEventShortcut as an argument. I added a new function ED_SHORTCUT_AND_COMMAND which will create a new shortcut and register it as mentioned above.
For the frontend I inherited a ConfirmationDialog that has a LineEdit to search for commands and a Tree to show the search results. Each TreeItem (row/search result) has two columns which contain a command name and its shortcut if it’s bound to one. We can navigate the search results with arrow keys, execute the command with the Return key and exit the palette with Esc.
Result
Coming up next
- Add more commands.
- Add plugin support.
- Make command palette to open scenes and scripts (Quick Open).
That’s it for this progress report! You’ll hear more about each project once they’re finished at the end of August.
A big thankyou to all students for their quality work and creative ideas to implement or improve those features in Godot, and thanks to all the mentors who support them!
