
Introduction
It’s been a month since the first progress report, and progress continues towards the new Godot renderer. Little by little every system falls into place, and rendering starts feeling a lot more mature.
That said, there is still a lot missing. Unfortunately, some tasks initially planned for Milestone #2 could not be completed yet, so they will be pushed to the next milestone.
Here’s the list of tasks for the current milestone and the next one:
TODO for Milestone #2 (November 2016)
Implement ShadowMapping.Implement Environment Probes (research cubemap, dual paraboloid).Implement Environment Probe and/or Skybox dynamic blending.Implement more PBR parameters: Sheen, Clearcoat, Anisotropy.Implement more Material parameters: Displacement, Refraction, Subsurface Scattering.- Implement Post-Processings: Tonemapping, adjustments, Motion Blur,
SSAO, DOF Blur, Bloom andScreen Space Reflections. Implement more types of geometry: Instancing (MultiMesh), Skeletons, and Immediates.- Implement Decals.
The remaining post processing tasks and decals will hopefully be done this week, though, so it’s not that bad.
TODO for Milestone #3 (December 2016)
- Implement the new version of the Godot SVO-based Light Baker.
- Implement Particle Shaders, with support for: Sorting, Collision and Soft Particles.
- Improve Culling: Portals (rewrite as polygon-based) and Rooms.
- Add Clustered lighting (before this all is forward).
- Add Layered/Stencil rendering
The new baker will probably take a bit more time, as this is an exciting area of research and a lot of nice ideas are ready to be tested (including the possibility of realtime-GI using an innovative technique).
Detail of tasks done for Milestone #2 (November 2016)
Following is the detail of everything that was implemented and a little background on how this was done!
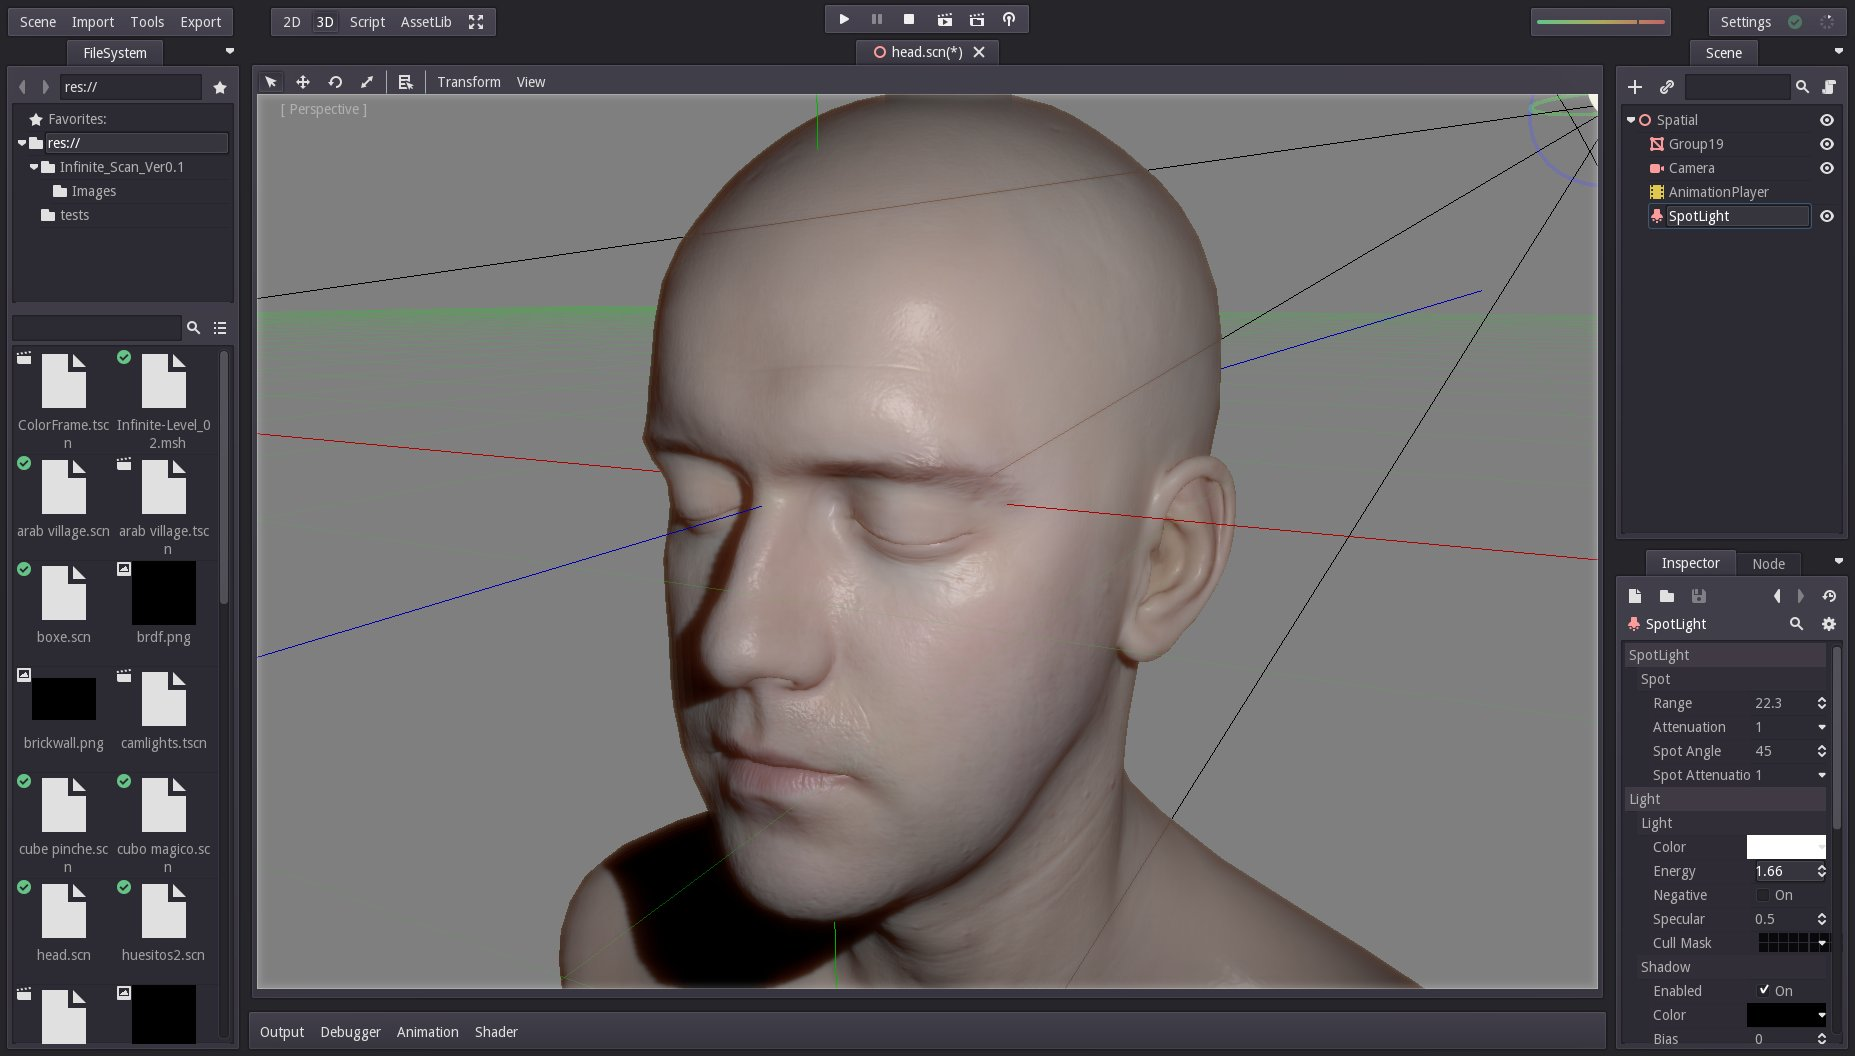
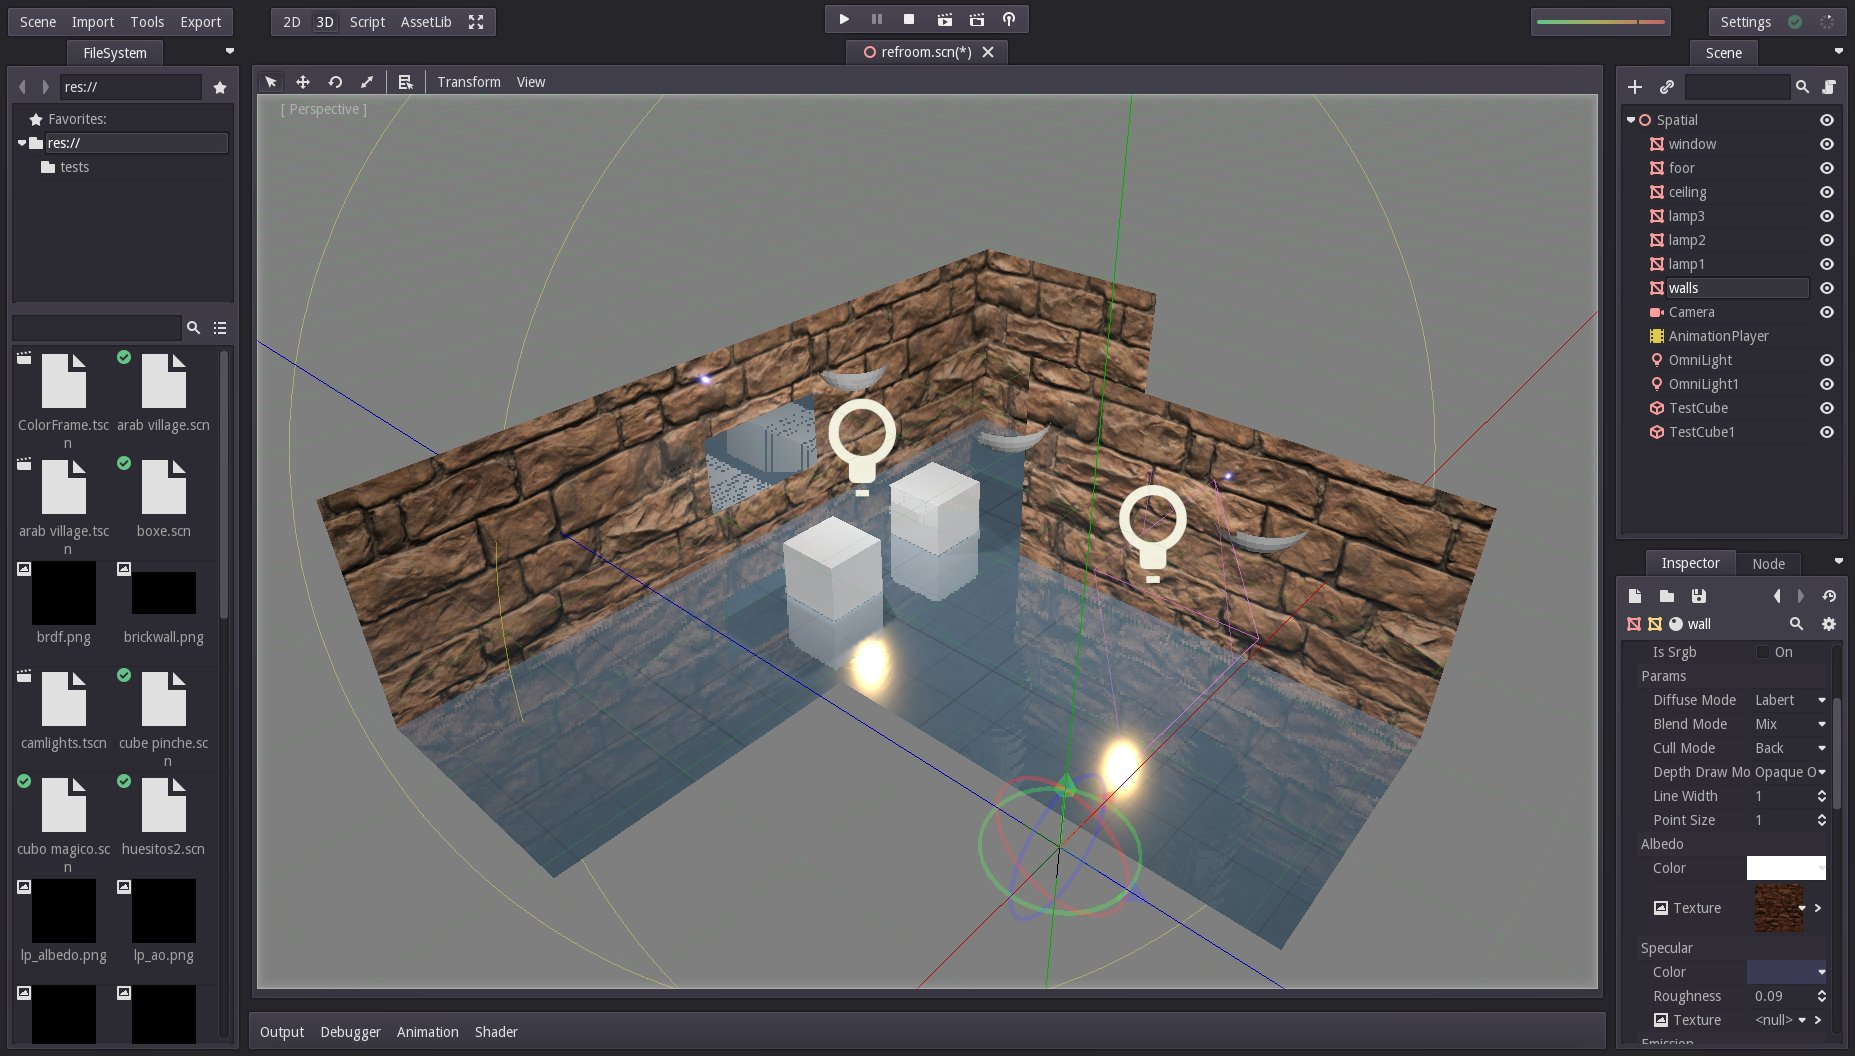
Implement Shadowmapping
Shadow mapping is implemented in Godot 3.0 using a Shadow Atlas. This allows rendering multiple lights in a single pass, be it using forward or clustered rendering. Shadow atlases exist for Spot and Omni lights (Directional uses its own texture, and multiple directional lights need several passes).
How the atlas texture is organized is up to the user, though the default is sensible enough to work in most cases. Atlas cells are assigned according to their size in pixels on the screen (e.g. if the light is using the whole screen, the biggest cell is assigned, otherwise an intermediary or smaller one will be assigned).
Below is an example of how this process happens:

Shadow Caching
As most light shadows will not change unless something moves around that area, Godot will not redraw such shadows unless needed. This ensures that a lot of shadows can be drawn on screen at decent performance. To improve on efficiency, we were contemplating adding some optimizations such as updating farther away shadows at a lower framerate.
Point Light Shadows
One of the big problems with point lights is that, to render them correctly, a depth cubemap must be used. This obviously conflicts with the idea of using an atlas (can’t really store cubemap lights efficiently on it).
Godot 2.x used Dual Paraboloid Shadow Mapping, a technique that is very efficient, but produced deformed shadows (notice the rounded edges and discontinuities). This was the source of complaints from many users.
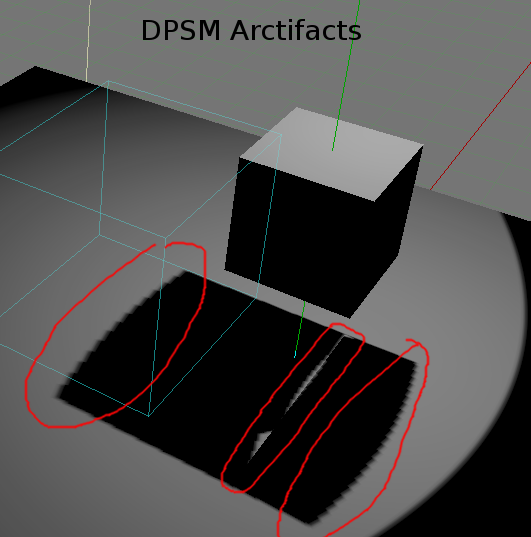
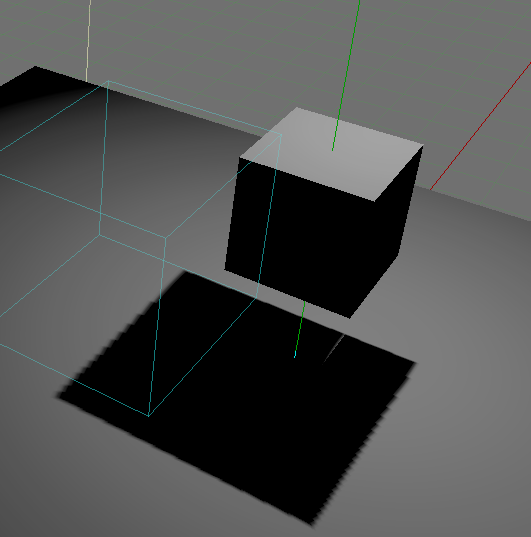
To fix this, Godot 3.0 provides an extra point light rendering mode where the shadow is rendered to a cubemap, then converted to DPSM. This produces flawless results at a bit higher (but not by much) cost. Users can now choose this mode when correct shadows are desired, or keep using the old method when performance is a priority over quality.
For point and directional lights, everything is more or less the same as before.
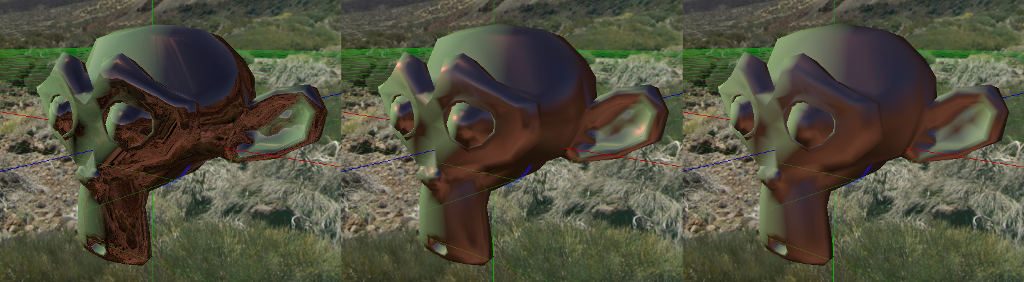
Implement Reflection Probes
One of the main features of PBR rendering is having all sort of sources for reflections. The most common (and cheapest) one is reflection probes.
These are basically cubemaps which capture a given area, and then everything inside their box uses them as a reflection source. To allow proper roughness, cubemap mipmaps are gradually filtered using the a GGX lobe, which allows quick look-ups.
In Godot, unlike in other engines, probes are also implemented as dual paraboloid. There are two reasons for this, but mainly that Godot 3.0 uses GLES 3.0 as it’s main backend and makes compatibility a priority. This means:
- Cubemap arrays are not supported in older hardware, mobile and WebGL2, and reflections need to be put into an atlas (for single-pass forward or clustered).
- Blending of cubemap faces is not supported in mobile and WebGL2, making blurred reflections look terrible. This is not a problem with DP.
Dual paraboloid reflections fix this, and have the added advantage of being able to choose cubemap-correct or fast, but incorrect reflections.
Reflection probes are relatively simple to use in Godot. Just instance one, set the bounds and adjust the origin. Everything inside will automatically reflect itself:
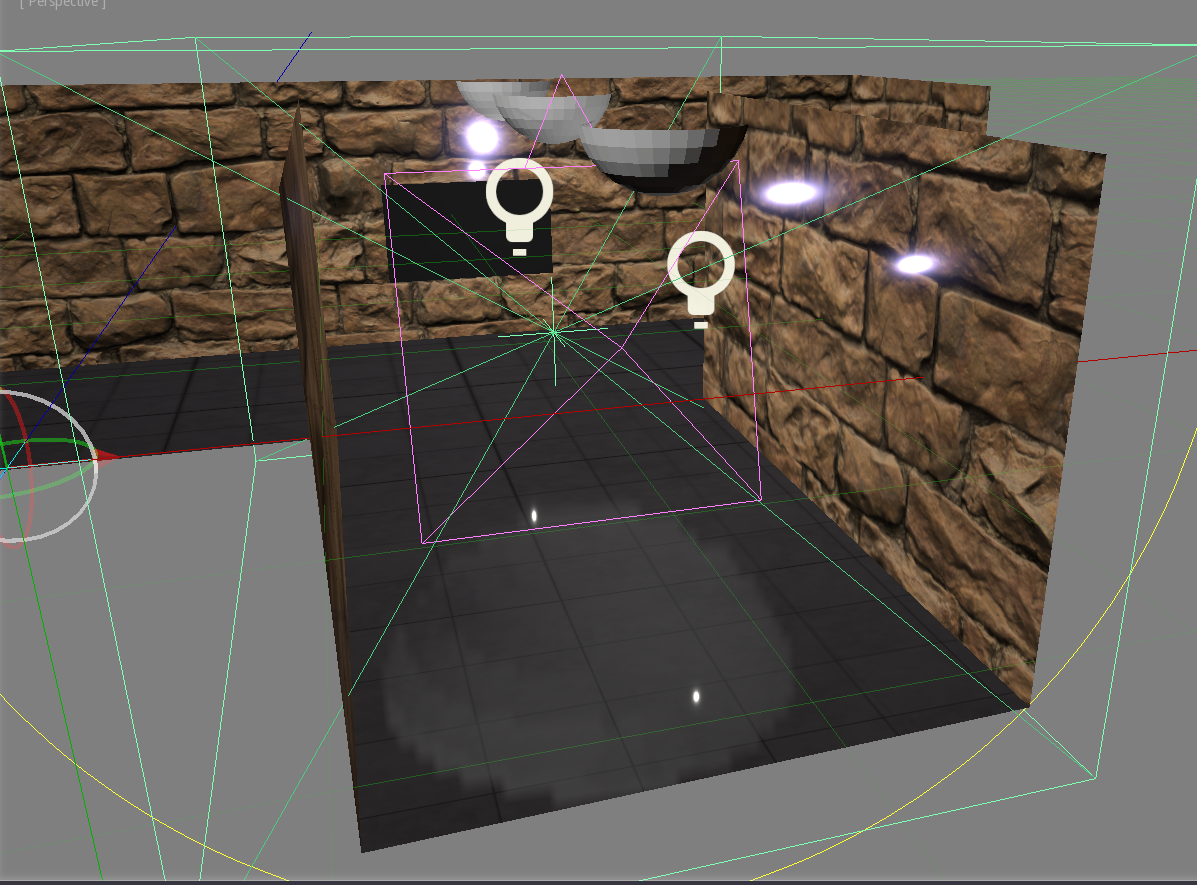
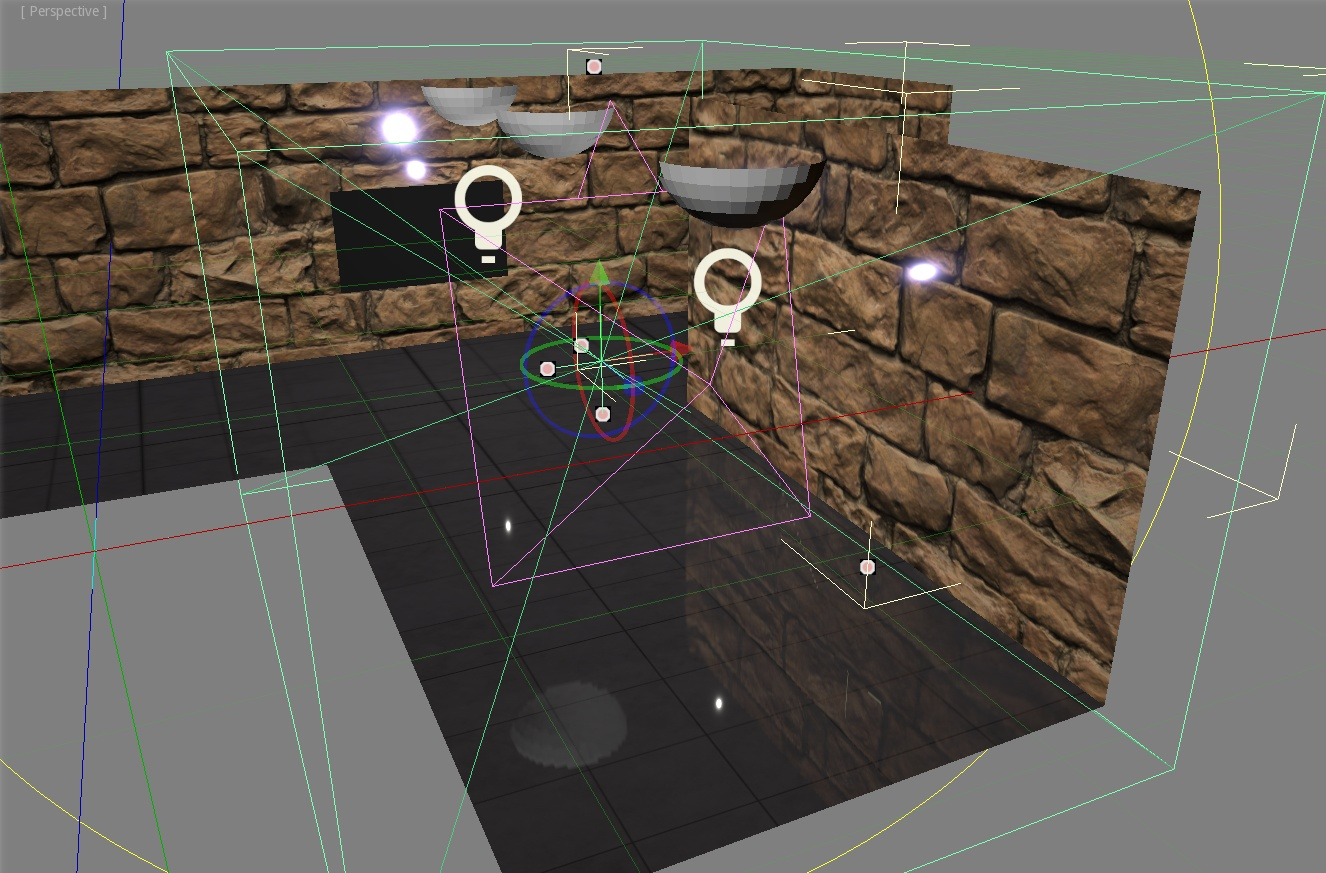
As you can see though, the reflection is too broad (there is a giant “lamp” at the bottom). For interiors, there is a “box project” option that will map the reflection to the sides of the probe, improving the reflection quality:
Of course, for a complex interior, several probes must be used to properly map all rooms and passages. This is one of the strong points of Godot implementation, which uses a novel blending algorithm between probes. Other popular game engines present hard edges between one probe and the next.
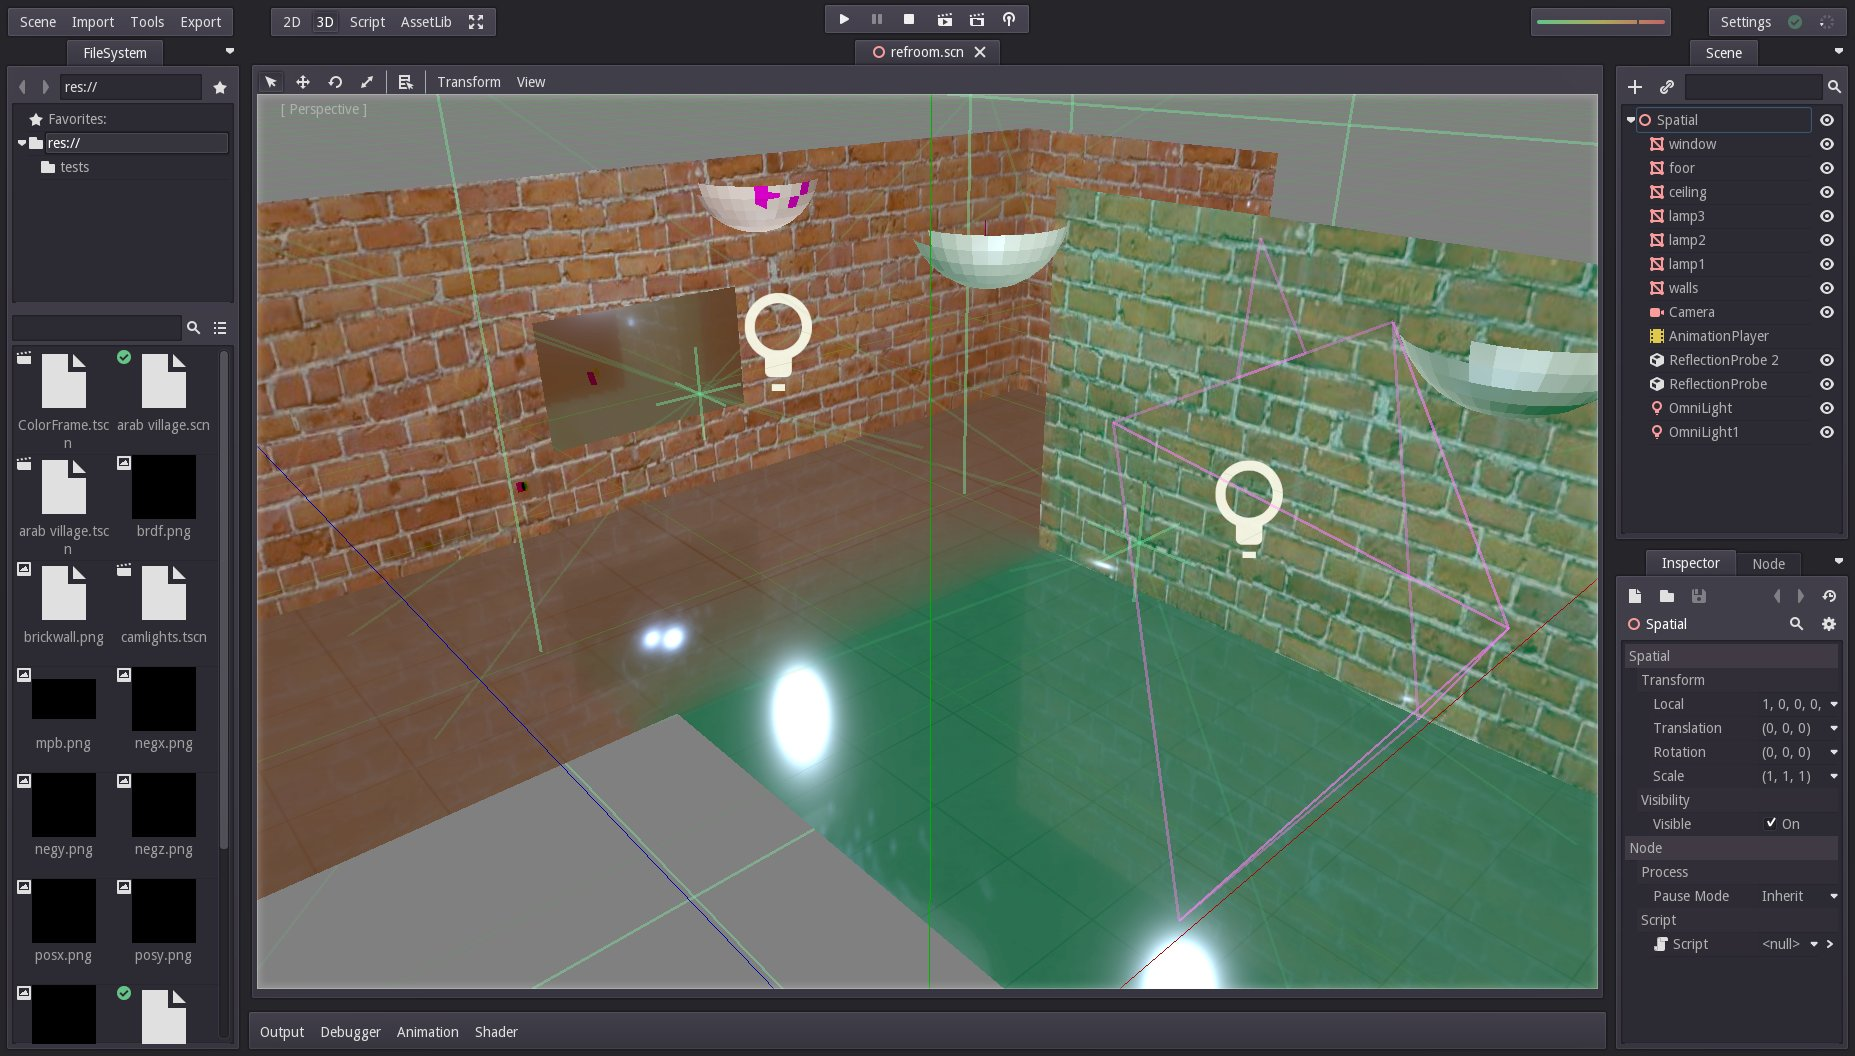
Godot also provides some nice options per probe, like custom ambient light, and the ability to mark them as “interior”, which changes some options with regard to how they are rendered (such as rendering the skybox and blending to it).
Implement more PBR parameters
Several more PBR parameters were implemented. Thanks to Godot’s Forward/Clustered design, the material system is far more advanced than in other popular game engines, requiring no hacks to allow a much larger amount of parameters ready to use for the artists, at no cost.
Specular Color instead of Metalness
Godot uses a specular color instead of metalness. This works as if metalness could be controlled per color channel, allowing a broader range of materials:
Rim Lighting
It is possible to set up a special rim lighting parameter. This adds some back-lighting to the contours of objects according to each light. It works well to simulate cloth or Mario-Galaxy style art.
Clearcoat
This parameter acts like a second specular dot. It works great on objects that have a certain amount of roughness, but that are also covered in some sort of shiny glass, pastic, liquid, etc.
Anisotropy
Anisotropy works great for materials that distort the specular reflection, such as hair, an LP, brushed metal, etc. A tutorial on how to use this will be eventually uploaded.
Ambient Occlusion
Materials can provide their own ambient occlusion, overriding global effects such as SSAO.
Subsurface Scattering
This parameter is used to simulate surfaces that reflect the light internally, such as skin, rubber, marble, milk, soap, wax, etc.
Implement Mid-Processing
Mid-Processing is the effects that are applied in the middle of rendering, before alpha pass and post-processing.
Screen Space Reflections
Godot uses it’s own screen-space reflection implementation. This effect allows showing reflections that can be calculated from the same screen-space. It’s meant to be used together with reflection probes, so there is always a fallback when a reflection can’t be found.
Blurring the reflection according to roughness is also supported, using a fast screen-space blur. This technique is not correct per se, but it’s very efficient.

Screen Space Ambient Occlusion
This effect is used and abused by a lot of developers. It obscures parts of the scene where the light should have more difficulty reaching. Godot’s implementation provides a few interesting things:
- It uses the Scalable Ambient Obscurance algorithm, which is very, very fast, allows huge radiuses.
- It allows two different radius and intensity settings, to be able to cover large areas and small areas at the same time.
- It allows “bleeding” into direct lighting too, so stuff that is receiving direct light can be obscured to customizable degree.

FUTURE
This month has been mostly implementing standard modern engine features, always with a twist to improve them the Godot way. Next month should hopefully be more interesting when work goes towards the new light baker!
SEEING THE CODE
If you are interested in seeing what each feature looks like in the code, you can check the gles3 branch on GitHub.