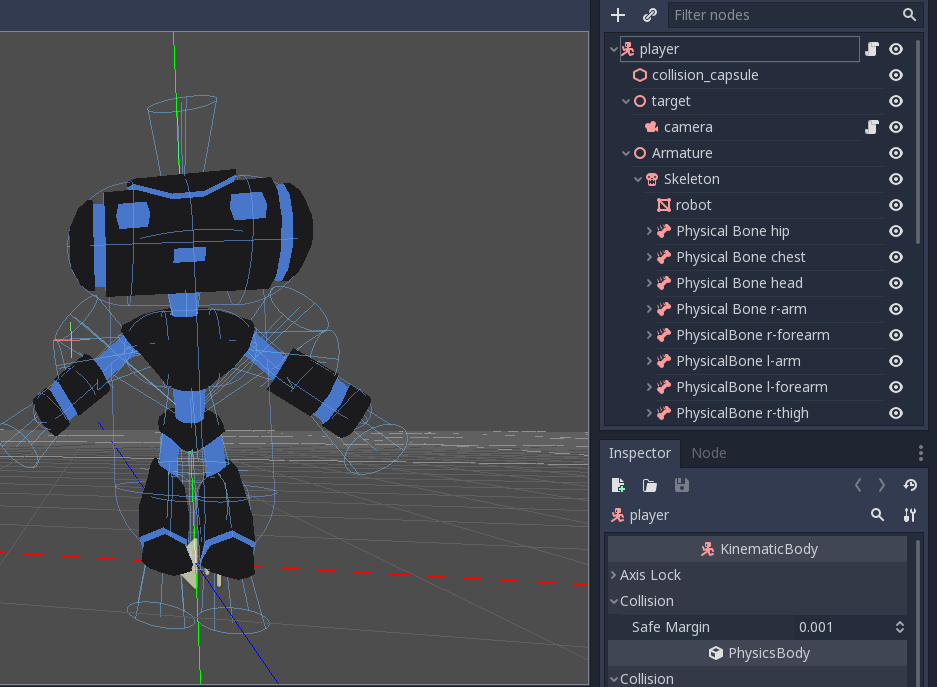
Godot is getting more and more interesting features in this period, and one aspect on which we are focusing on is the Skeleton node.
We are working on implementing some features like Inverse Kinematics, Ragdoll, a better animation player, and a state machine player. All these things will allow the developers and artists to apply some animations to their characters easily and at the same time with an awesome result.
I’m Andrea Catania, and in this article I will explain how to use the new Ragdoll feature available in Godot (in the master branch coming in Godot 3.1). But I’ll start with a couple lines to introduce myself. I’m the contributor who integrated the Bullet Physics engine in Godot 3.0, which was my first Pull Request about a year ago. I’m now taking care of most physics things and animation (like ragdoll, IK, SoftBody, etc.). I’m a computer graphics and physics passionate, and always looking to learn and discover new things.
Now let’s start!
How it works
To show you how to use it, I will apply it to the Platformer3D demo that can be downloaded on GitHub or on the Asset Library.
Create physical bones
The first thing to do is to select the skeleton node (in the player scene of Robi the robot). You will notice that a skeleton button appears on the top bar menu:

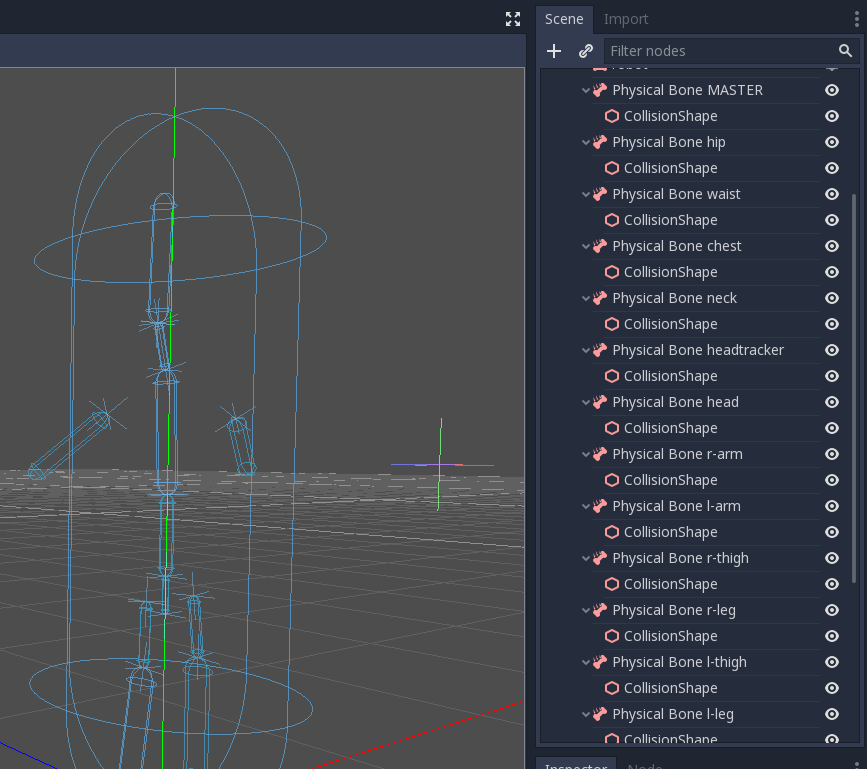
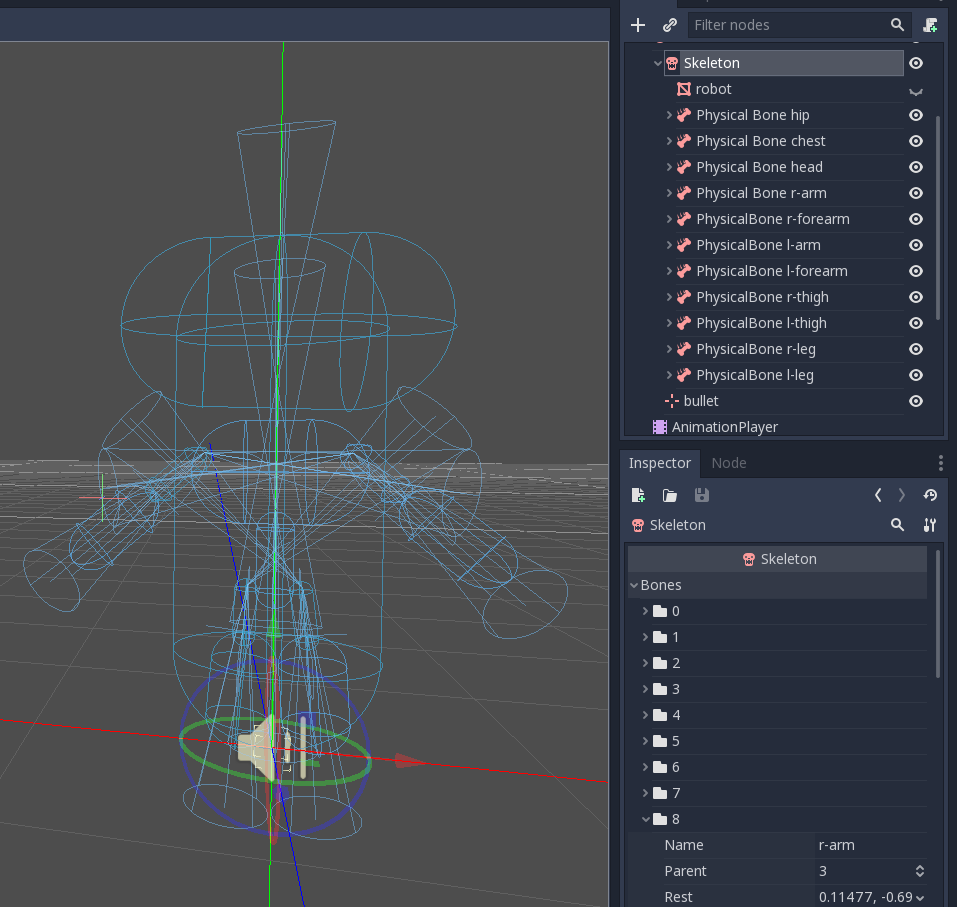
Click it and select the Create physical skeleton option. The engine will automatically generate physical bones (with their own shape) for each bone of the skeleton.
Clean up the skeleton
In the picture above, you can see that there are unnecessary physical bones like the MASTER bone, so the first thing to do is to clean up our skeleton by removing these physical bones.
The rule is that you should remove all physical bones that are too small to make a difference in the simulation and all utility bones (like the MASTER bone in this case).
For example, if we take a humanoid skeleton where the hand is comprised of many bones, it’s really useless and wasteful to maintain all bones of the hand. One important thing to do in this case is to remove all physical bones and replace them by one or two bones to simulate the hand.
To clean up our Robi I chose to remove these physical bones: MASTER, waist, neck, headtracker. This step is not mandatory but it is recommend to clean up the generated skeleton, so that you end up with an easy to maintain and optimized skeleton structure.
Collision shape adjustment
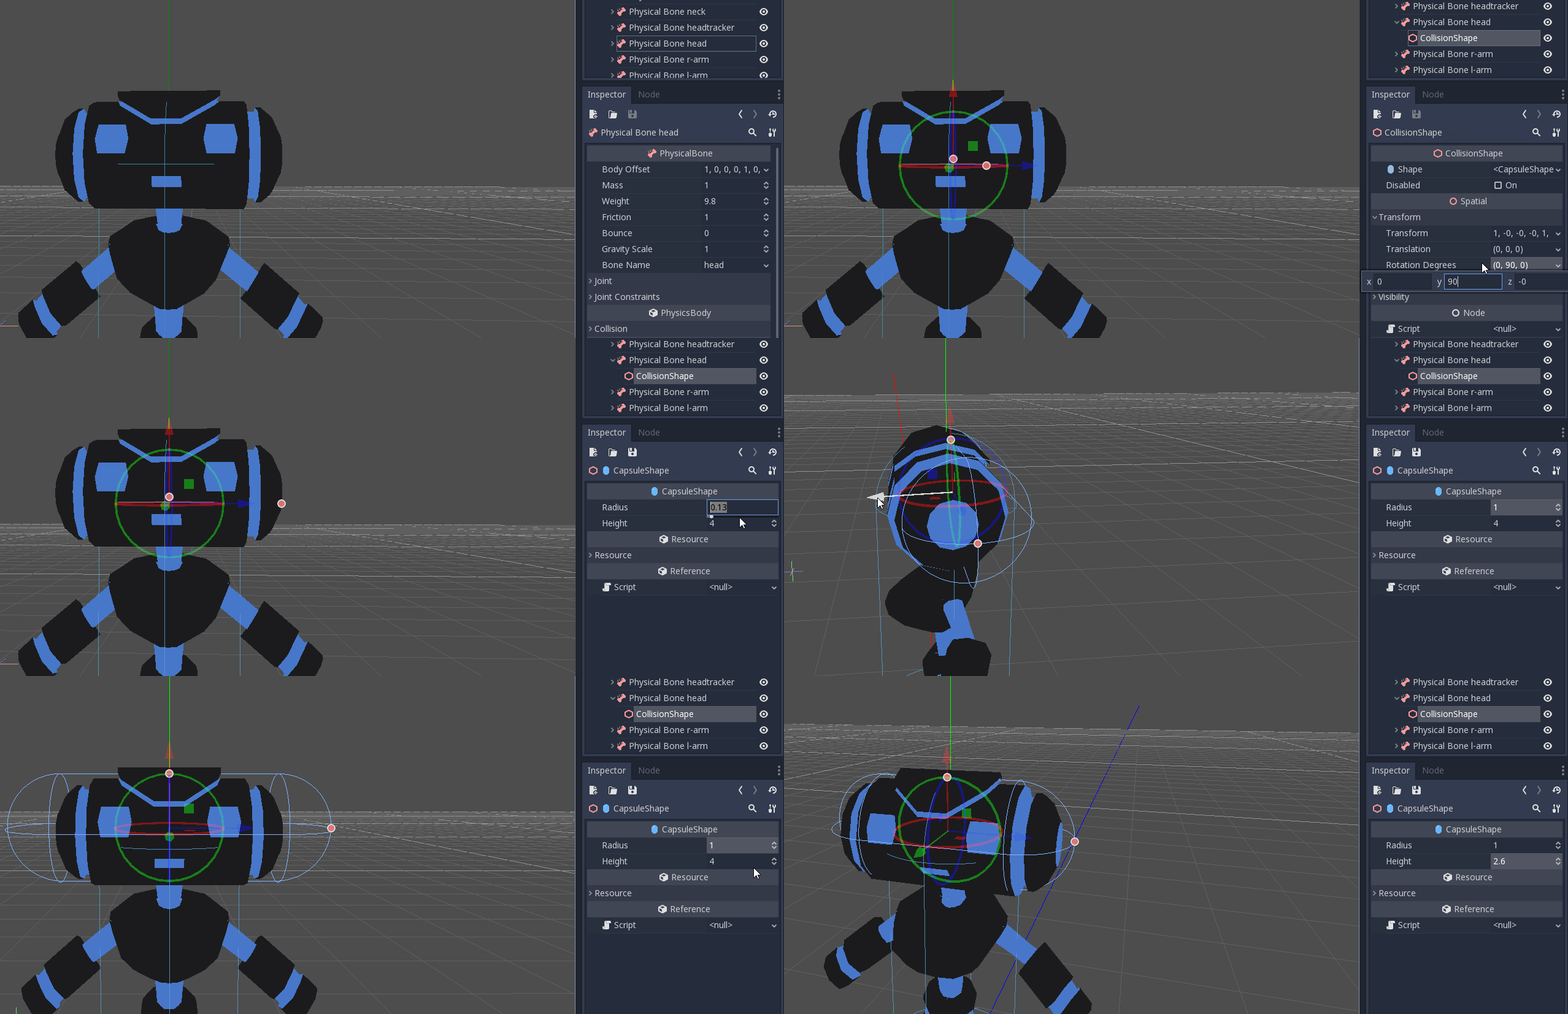
After cleaning it up you will have to adjust the collision shape and/or the size of physical bones in order to match the part of body that each bone should simulate.
Joints adjustment
After the collision shapes adjustment your ragdoll is ready to be used, but before doing it I like to change the joint between each bone.
The joint assigned by default is Pin Joint that doesn’t has any constraint. To change it you should select the physical bone then change the type of constraint in the Joint section. It’s possible to change the orientation of constraint and limits.
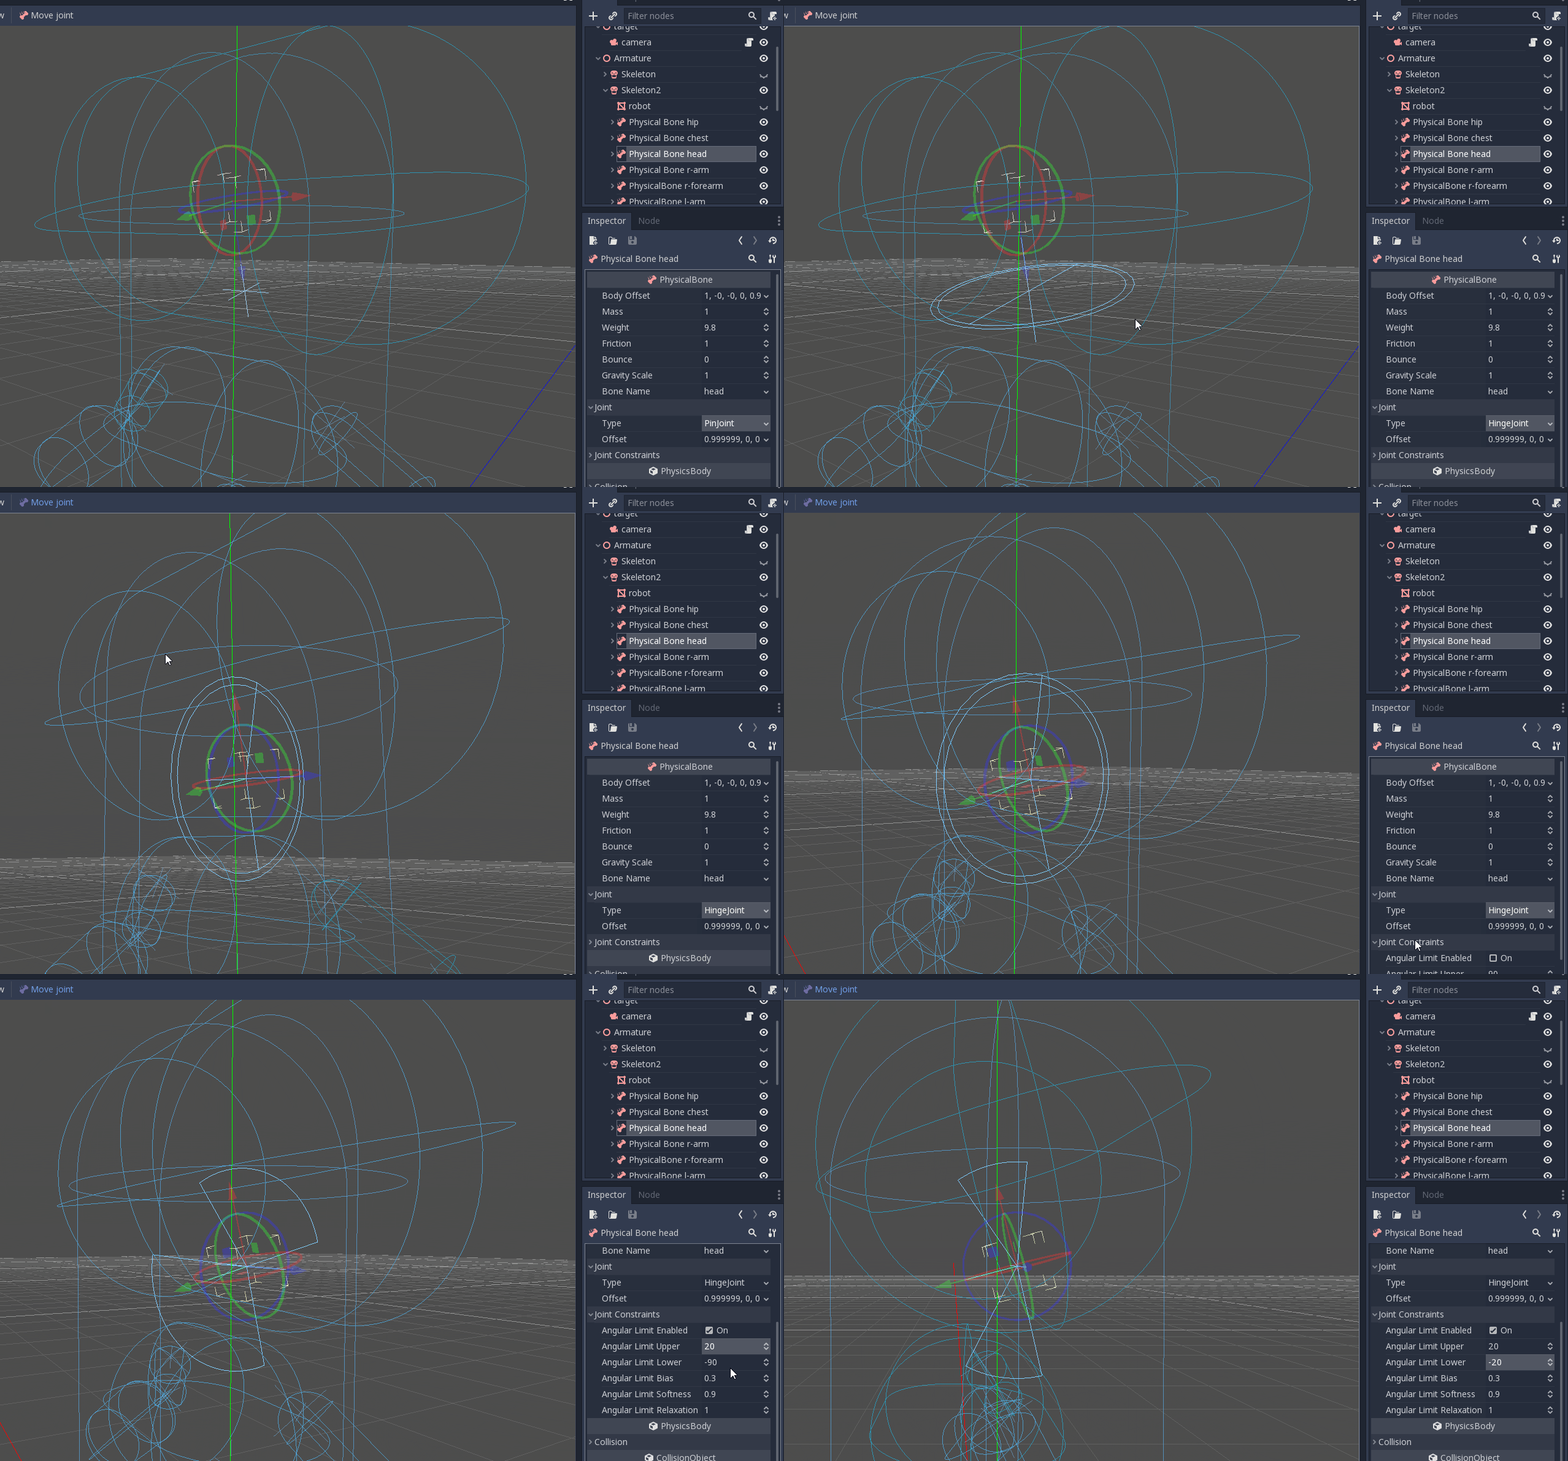
Now Robi’s head will move like a real head!
My final result is this:
Start and stop the simulation
Now it’s really simple to start the simulation by attaching a GDScript and writing down this code:
func _ready():
    physical_bones_start_simulation()
To stop it you can call the function physical_bones_stop_simulation().
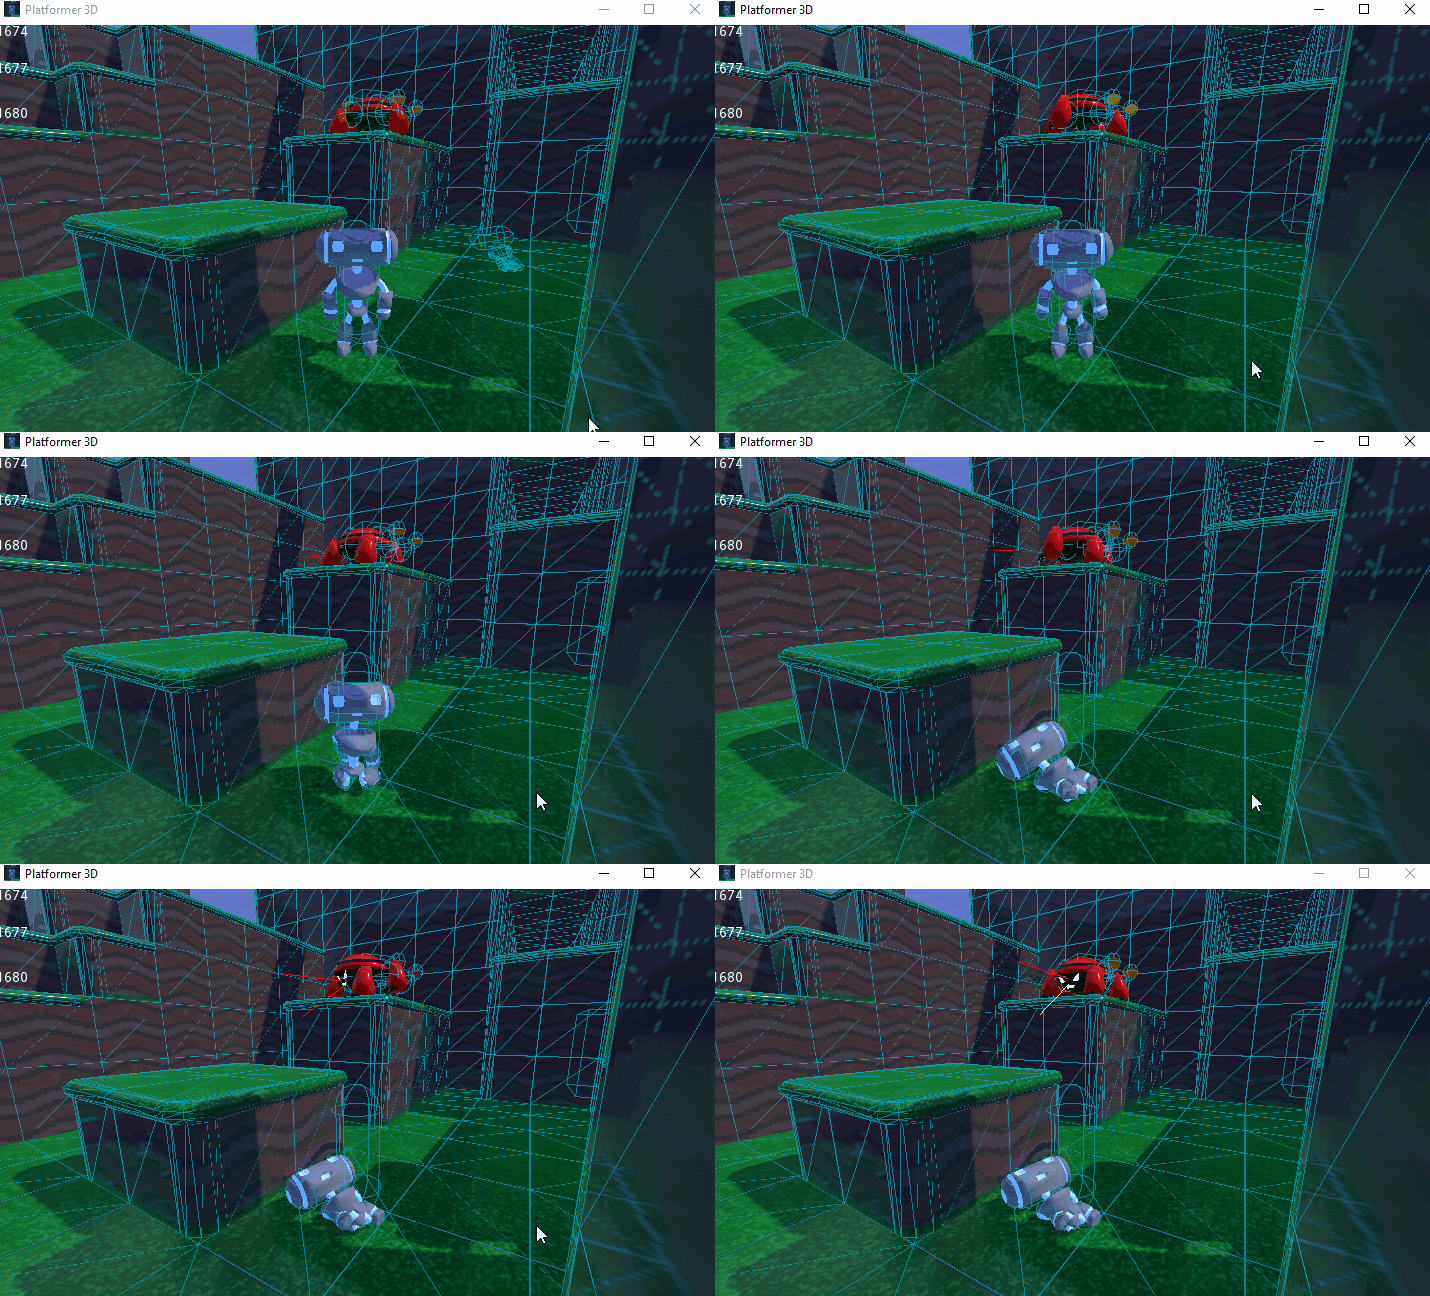
But what if I want to start the simulation for just a few parts of the body? Yes, it’s simple enough to do by changing only one line of code: :P
func _ready():
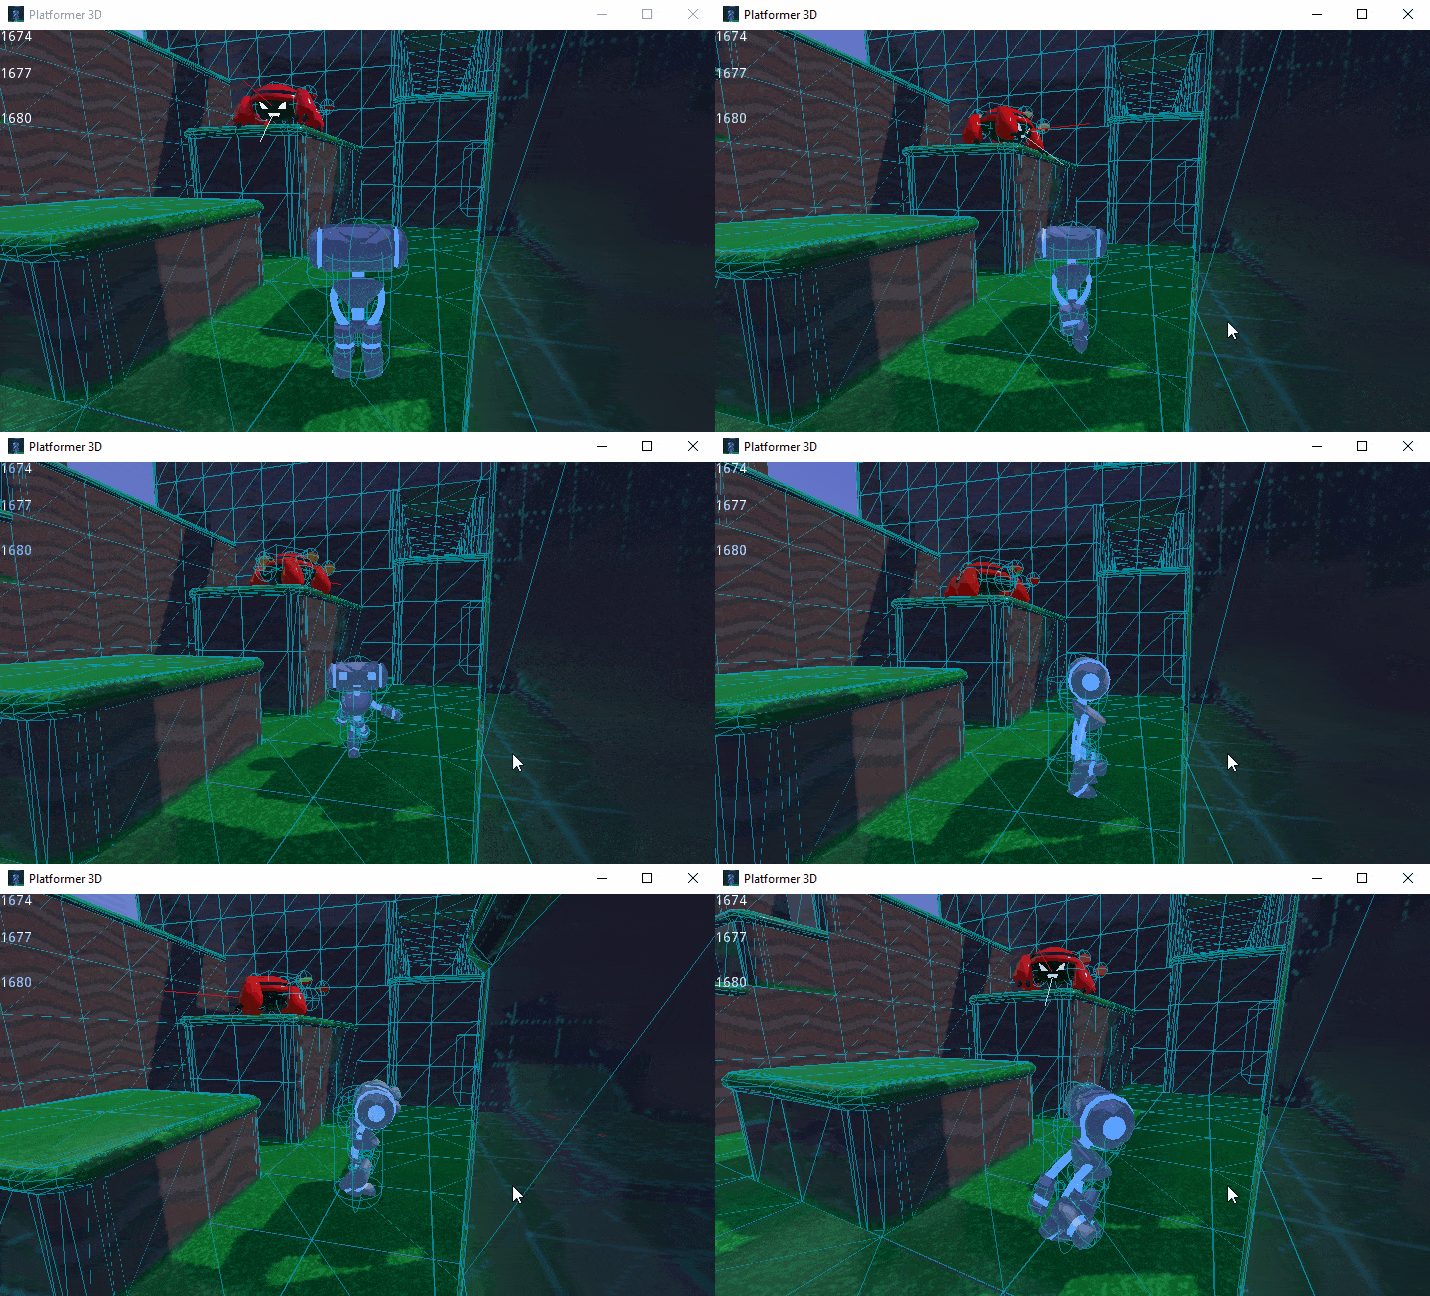
    physical_bones_start_simulation(["r-arm", "l-arm"])
With the code above, we are passing to the engine the names of bones for which we would like to simulate physics, and this is the result:
Collision Layer and Mask
Last but not least you have to properly set layer and mask in a way that doesn’t collide with kinematic capsule but collide with ground:

What’s next?
The next thing that I will implement is the active ragdolls that will allow us to influence the physical bone position. This mean that the body will tend to maintain a defined position while ragdoll is active.
That’s it for now, enjoy ragdolling!
