With the import system rewrite in Godot 3.0, the ability to import atlases was lost. Using atlases is not as common nowadays, given the processing power of desktop and devices has increased a lot, but there are many use cases where this may be worth it. Godot 3.2 will bring back support for it.
What is an Atlas?
Importing images into an atlas is a process that will take all of the images, and pack them into a single larger image (called an “Atlas”). Then, when the original image needs to be drawn, it actually draws the piece of the larger atlas.
Character is (c) Square Enix.
This is also only useful for 2D (Godot does not support 3D atlases).
So, why would one use an atlas instead of individual images? In most cases, it doesn’t make sense, but for some situations it may provide some improvement in memory usage or performance. Here are such cases:
Batching
In cases where a lot of objects need to be drawn, having them all share the same texture (or material) may reduce draw calls or state changes. When working on tile-sets, it’s normal to have everything already drawn to a single texture but if the level uses a lot of separate images, then using an atlas may make sense to improve performance.
Optimizing Memory
When doing character animations, specially characters with hundreds of thousands of animation frames (like Cuphead), using an atlas will not give any increase in performance (as only one frame is drawn at the same time).
However, to ensure animation remains fluid and easy to integrate, animators will use a relatively large image size that remains constant, then animate a smaller character inside. This produces a lot of wasted memory, as these empty places in the animation frames take up a lot of video memory and make loading slow.
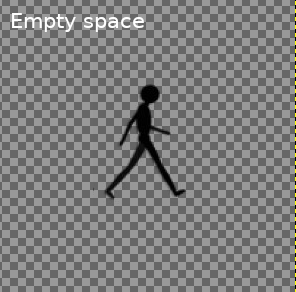
Using atlases ensures that, before placing all the animation frames in a single image, the frames are cropped (and the offset to the crop remembered). The packer will then, ensure everything is fit in the atlas image as compactly as possible. This makes it easy to optimize for memory, as only the places in the images that contain information are saved.
How to use atlases in Godot
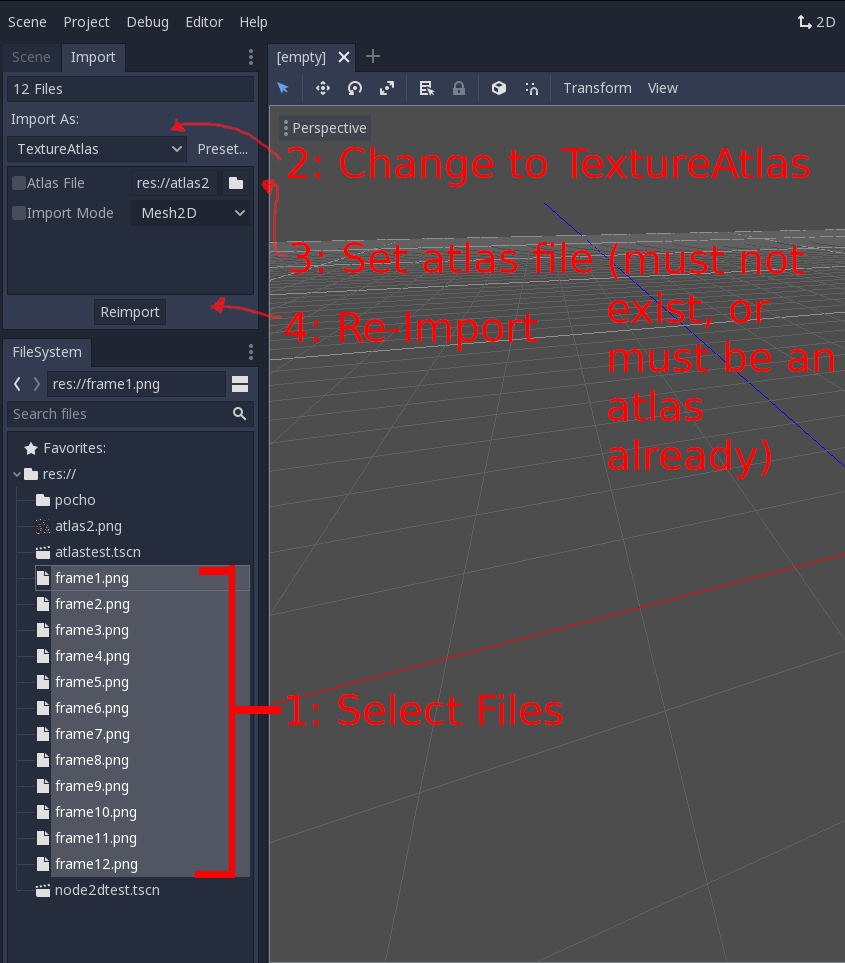
Using atlases in Godot is extremely easy. Just select all the files that you want to pack together in the Filesystem Dock, then change the import type to “Texture Atlas”.
When the new file type is selected, change the “atlas file” setting to the image you will want to create, then push the “Re-Import” button. All your assets will be re-imported and added to an atlas. (The editor will restart afterwards, as the images may be in use, to ensure everything is re-opened in a clean state).
Here is a visual explanation:
Packing is also deterministic, which means that the same image should always be generated (this ensures it works for generating normal map atlases separatedly, as an example).
Import modes
As you may have noticed, atlas files have an Import Mode, settings. There are two possible ones:
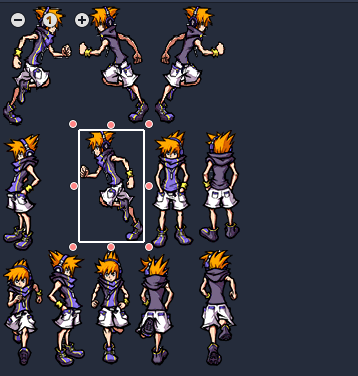
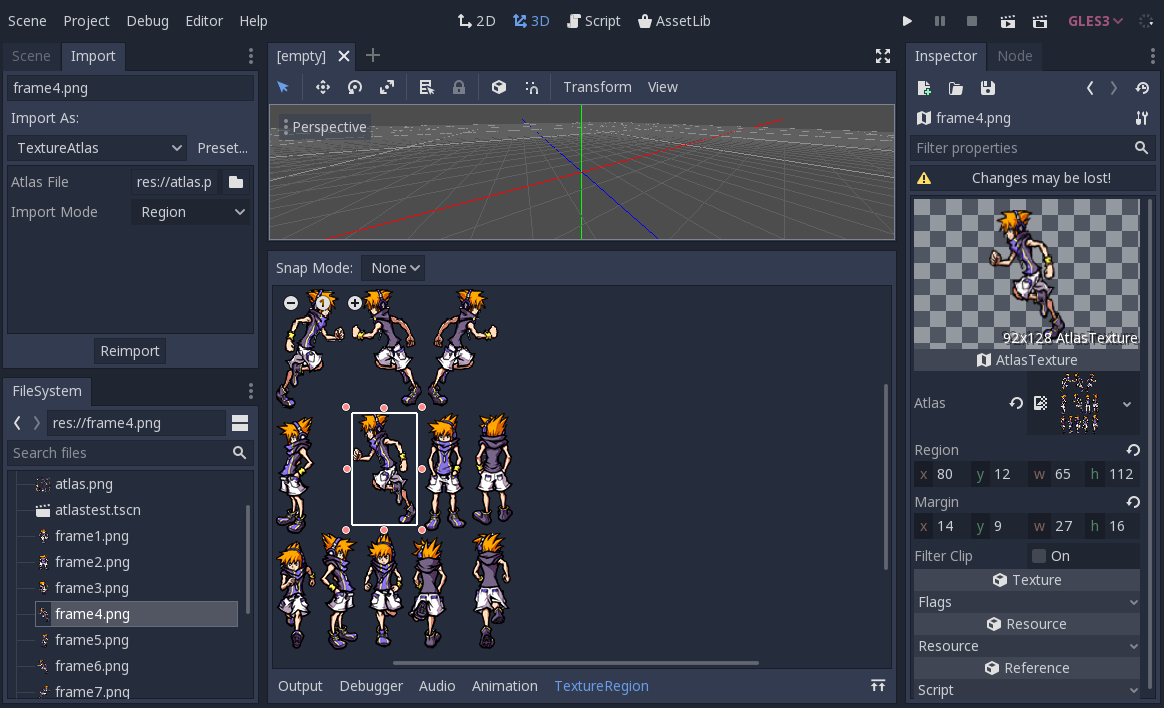
Region
This packs the used part of the image in a square region in the atlas, then this is referenced in an AtlasTexture. Region takes up more space, but allows drawing only parts of the image, clipping it, etc. It also means that it can be batches. This mode is ideal for optimizing performance, as mentioned above.
Mesh2D
This cuts a polygon around the used part and packs it, resulting in considerably more efficient packing. The downside is that drawing it is less flexible (some operations such as showing a region of it are not possible). It is not possible to batch meshes either. This mode is ideal for optimizing memory in the mode mentioned before.
Future
I hope this is the last feature I will personally add to Godot 3.2, so I can soon move to work on Vulkan. As always, if you are not yet, please consider becoming our patron, help us hire an extra developer and ensure that Godot development remains free.